Wednesday, March 28, 2012

Waukegan Harbor: Kite Aerial Photography

I had recently upgraded my Remote Control hardware use the Aurora 9 Transmitter and Optima receivers specifically for my Y6 Scarab MultiWiiCopter project, and decided to include using this with my Kite Aerial Photography Rig. 2011 was a year where I used my AutoKap rig 90% of the time, with the only session I can remember using my remote control rig was for the WWKAP Banner project. I wanted to get back to using RC, so I bought a 6 channel Optima Receiver and updated my Brooxes deluxe KAP kit.


Here are some images from last Sunday using the remote control rig, a Flow Form 32, and a Sony NEX-5. Without being able to pan and tilt the camera, I wouldn't have been assured these images.


DIY: Road Case for Scarab MultiWiiCopter: Reliable Hardware

The Y6 MultiWiiCopter build was exciting, but quickly realized that I needed a method of protecting my new copter and keeping it safe while transporting it. I did some quick searching on Google, and didn't really find anything that would work, so I decided to build my own case. I found a site called Reliable Hardware, that sells all the parts you'd ever need to build a road case. Although it was a bit more than I'd hope to spend, I know that this solution will provide a protective shell for my copter, and hopefully carry the transmitter, batteries, and cameras too.


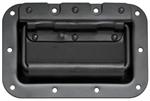
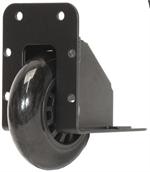
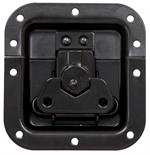
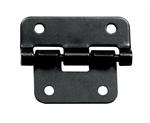
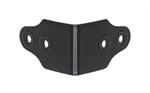
I will be using 1/8" rivots to hold everything together, and will be using .5" high density foam on the inside. Here is my inventory from Reliable Hardware:

RH-1027BK
8
Medium Ball Corner, Black - RH-1027BK
RH-3040
3
1/8 Inch Double Angle Aluminum Extrusion - RH-3040
RH-1170
1
Break-Apart 1/8 Inch Aluminum Tongue and Groove Extrusion - RH-1170
RH-6625
2
Edge Mount ABS Amp Handle - RH-6625
RH-0511BK
2
Medium Recessed Handle, Black - RH-0511BK
RH-9024BK
2
Medium Recessed Tilt Caster Housing, BLACK - RH-9024BK
A3020-BK
1
Medium Recessed Latch Black - RH-A3020-BK
RH-1225BK
3
Take-Apart Hinge, Black - RH-1225BK
RH-1722BK
8
Large 4-Hole Clamp w/Rivet/Screw Protectors, Black - RH-1722BK
RH-3500GY
1
ABS Laminate, Dark Grey - RH-3500GY

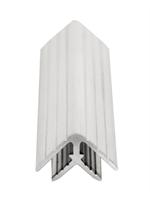
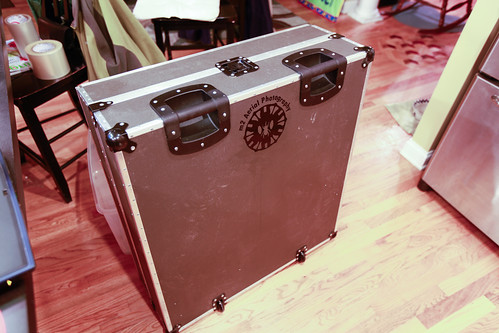
Besides the foam, the only other thing that I needed to pick up was 1/8" plywood from the local home improvement store. All of the parts that I bought are cut to fit the 1/8" plywood, and wanted to keep the weight down as much as possible, and believe that this should be sufficient. I will be adhering ABS Laminate to the outside, which will enhance the look of the case.


The outside is almost complete in this image, and will have to add some final corner protectors.

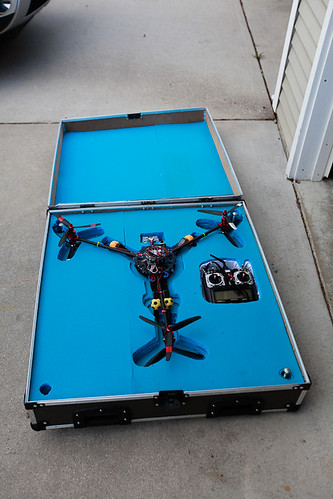
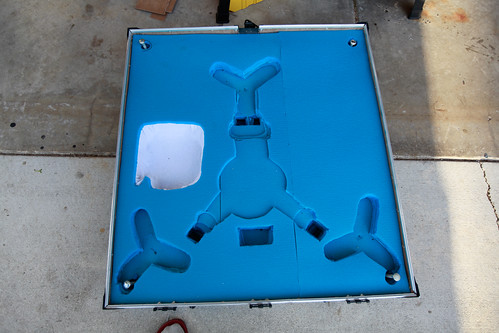
Update: Allocated the foam by using .5" sleeping pads from Wal-Mart. This option was actually cheaper than ordering 2" foam from any site I could find. It was tedious, but I used spray adhesive and glued together layer upon layer of blue foam until it filled the bottom half of the case. I had to cut each layer to accommodate the copter and legs as I built up the foam from the bottom. It's not perfect like a laser or CNC machine would do, but it fits securely. I also created a cut-out for the transmitter. I'm waiting on some batteries, and may end up cutting slots for those too so everything transports in one big case.

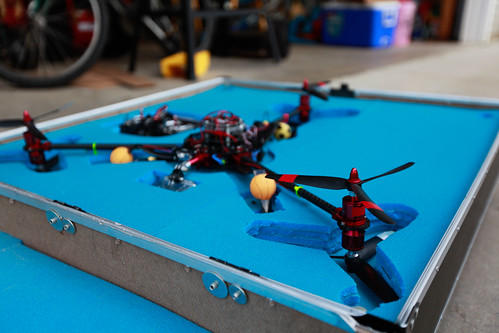
The copter does stick out a few inches above the bottom half of the case when it's open, but the lid shuts securely and keeps everything nice and snug.


Here is the bomtom half of the case withou tthe lid and sans copter so you can see the sweet foam work I did with an exacto knife. It gets the job done.

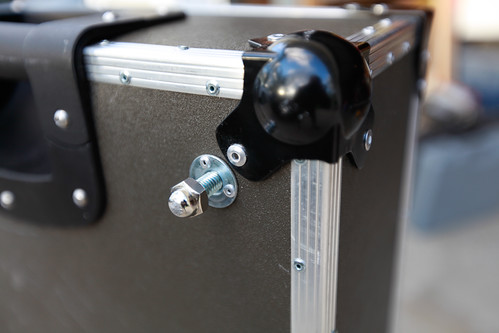
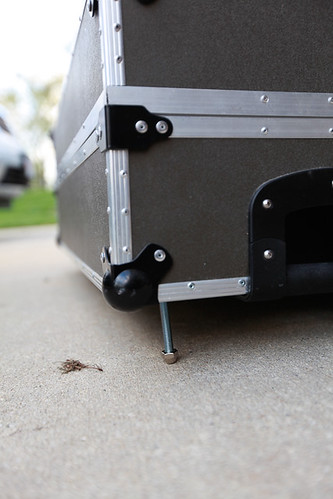
One design addition at the last minute was to rivot t-nuts onto the bottom of the case and add 6" bolts coming down from the inside. Since the Y6 flys better if you power it on on a leve surface, the case has built in legs! Basically, I use a bubble level on the top of the case, and unscrew whichever side is too low until the top of the case is perfectly level. When finished, the bolts are screwed back into the case and hidden.

Here is the leveling bolt on the corner back into transport position.

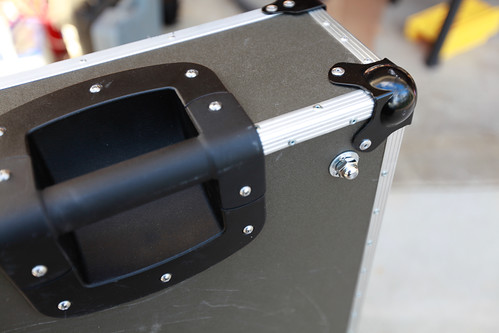
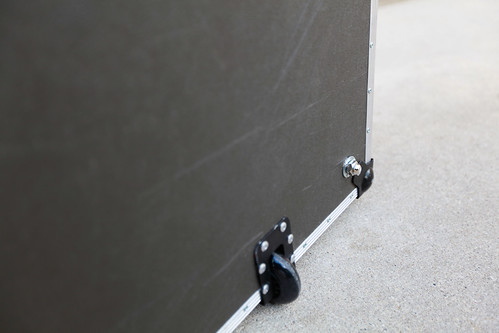
All 4 corners have leveling bolts, as this one is on the bottom near the roller wheels.

Leveling bolts in action on my sloped driveway.

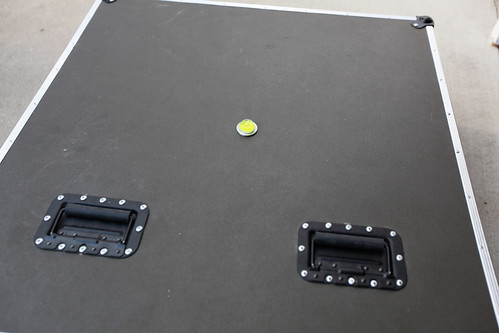
Here is the bubble level that I'll carry with me to ensure a good, level starting point.


I have a few parts coming from Reliable Hardware, including some feet to ensure the case stands upright. I'll also work on customizing the lid to ensure a more comprehensive fit, but for now, it works great, and the Y6 is safe and ready to travel without fear of breakage enroute to any flight.


Saturday, March 10, 2012

Y6: MultiWiiCopter: Part VII - Test Flight

This is my journal of the Y6 MultiWiiCopter build process. I do not claim to be a technical writer, nor an expert of advanced model engineering, and my goal for this blog post is to post images of my copter through construction and attach some notes of my successes and failures along the way, in hopes of helping others as they put together their copters. Please use my techniques and decisions at your own risk.
The instructions say that the first thing you should do before anything else is configure your transmitter for use with the PARIS boards using the MultiWiiConf software. Setting the sub-trim levels on the Aurora 9 transmitter and verifying that you have the right cables plugged into the PARIS in the right spots is essential.

The MultiWiiCopter site has the recommendations for these settings posted on their wiki. I really had to tweak my YAW settings, as I was not able to get the copter to ARM and DISARM gracefully. I tested each setting in the sub-trim menu for RUDD: and set to -13, which was the best I could find. Disarming is not always immediate.


65 degrees (F) in Wisconsin in March is rare, so I couldn't resist taking my new copter out for it's first test flight. It was much windier that I had hoped for, but couldn't wait any longer. All my Lipo's were charged, and I ventured out to find a spot where I would kill anyone if something went wrong. I also decided that putting the GoPro HD Hero 2 on the front would be a risk I was willing to take, whereas originally I was going to fly without the camera. I thought I would keep the copter low enough initially to keep the equipment safe.

It did take a bit to get the copter to fly without spinning in one direction of the other, but otherwise it seemed to fly well. Since I don't have a ton of experience with these things, I can only go off my gut feelings. I thought that the controllers were very touchy on the Aurora 9, and that one step in the throttle controls up or down made a big difference. I would have thought that I could have the copter hover, and I seemed to always be going up or down. The drift caused by the wind didn't help either, and really need to test this on a calm day. The good news is that I didn't have any major crashes, but did snap a few props with some hard landings.

The good news is that the Y6 flies. I was concerned over the build process that I would have issues, but seemed to have nailed it. I think now, I just need to work on balancing the props better, and getting more flying time. I'm not sure I was so nervous, outside of catastrophic failure worries, as my time flying the mini-quad definitely helped. I would recommend that anyone get flight time on a smaller copter before trying a Y6 like I did. The video below is towards the end of my test flights, and is recorded on a GoPro HD Hero 2 at 60fps. It was slowed down to 29.97fps in Adobe Premiere. Otherwise, there is no other video enhancement, or de-shaking. I can definitely see the vibrations in the footage, but am overall satisfied with the results. Not a big fan of the fisheye lens on the GoPro, so will need to add another servo for the panning to keep the horizon level, or just use my other camera.

Click on image below to view video:


Here is the same footage after running it through VirtualDub with DeShaker. I left the black edges on the footage so you can see how the software moves the video around to make a more stable video.


I will be honing my copter flying skills in the next few months as much as possible, as well as trying to find American suppliers of replacement propellers!

Y6 MultiWiiCopter: Part VI - Assembly

This is my journal of the Y6 MultiWiiCopter build process. I do not claim to be a technical writer, nor an expert of advanced model engineering, and my goal for this blog post is to post images of my copter through construction and attach some notes of my successes and failures along the way, in hopes of helping others as they put together their copters. Please use my techniques and decisions at your own risk.
The wiring up to the control boards need to get funneled through the top deck.

The ESC's are connected to the motor wiring after the booms are loosely fitted to the boom holders.


The gimbal assembly is also fitted.

The top deck is positioned and the 2 PARIS boards are mounted to the top decks with nylon spacers, and connected to the receiver


I labeled all the ESC connection wires so I would know where to plug them in to the PARIS board.


Props were balanced using tape. I'm not going to try to explain this here, as Google is your friend in finding better instructionals for balancing props.

I used a dremel tool to grind down the motor shafts so the Propeller is closer to the motor. I think I can shave more off, but want to test the copter first.

Final copter with camera attached. This is the Sony NEX-5 with 16mm pancake lens with wide angle adapter.


You can see that this is still a bit of a gap, so the shaft could get shortened more.


Ready to go with the GoPro!

Next steps are to configure the leveling, and going back through the documentation to ensure a safe inaugural flight.

Continue to Part VII: Test Flight - Coming Soon!