Tuesday, December 7, 2010

Worldwide Kite Aerial Photography Week 2010 Book

I volunteered to be the designer and publisher for the 2010 Worldwide Kite Aerial Photography Week book. There were 47 photographers that participated and submitted content for this year's book.


This book has been my life for the past month, and have spent a few long weekends compiling the pictures and stories into a custom book. I decided to not use a template and created custom pages for each and every kiter. Special thanks to Brooks Leffler, Peter Boyton, and Ramiro Priegue for helping me proofread the content.

The images in this book are a showcase to Kite Aerial Photographers around the world. The KAP Discussion Board is the source of this kite family, and the book is currently in it's 3rd edition. I'll be happy to turn the torch over to the next designer in 2011!!


A feature that was added to this year's book was a map showing where everyone around the world is located. These are not the locations of the places where the KAPers took pictures. I've also posted an interactive online version of this map for viewing:


Monday, November 8, 2010

DIY: GoPro Flat Lens Underwater Housing (Focus Fix)

I have a trip coming soon to the Florida Keys, and have big plans for my GoPro HD Hero cameras. In addition to some Kite Aerial Photography, we'll be doing some kiteboarding and sailing, and these little camera's will be mounted just about everywhere. The one negative feature of the GoPro HD Hero is the soft focus due to the curvature of the lens when using the underwater housing actually under water. A few clever Do-It yourselfers figured out that if you place a flat lens in front of the Hero while using it underwater, you get perfect focus. I decided that I would research this and attempt to create a "flat lens" housing myself.


You can purchase these types of flat lens housing from Eye of Mine and other 3rd party suppliers, and will run you about $70 the last time I checked. I had an extra housing, so I decided to go with the DIY model. Using trusty ol' Google, I stumbled across this site which basically was exactly what I was looking for. The guys at Jazz and Fly fishing deserve all of the credit, and I just replicated what they did with a few minor tweaks. I ordered a 58mm UV lens off Amazon for a few dollars, and a couple of Avent Baby bottles. I had the Epoxy already, and I used spray paint versus magic marker to get the cap black.


I used a dremel tool to adjust the avent bottle cap to the right inner and out diameter, versus using a hobby knife. I used an old lens cap off an old camcorder to protect the new lens, and secured it in place for travel with rubber bands.


So, does it work?

I was dying to test it out, so I filled a large stainless steel pot, and recorded a couple quick movies using the original housing, and the new flat lens housing. The original housing is blurry, and you cannot read the card that I was holding on the bottom. The new flat lens housing was a drastic improvement. The words are instantly readable. I'll post some video of something more interesting now that I know that it works! See for yourself:


Thursday, October 14, 2010

Star Trails: Yerkes Observatory

Recovered From October, 2010:


"The weather has been unseasonably warm the past week or so, and I was able to go out on a couple of nights to attempt star trail photography again. It's very difficult in my area due to the surrounding light pollution of the cities, so I tried to find areas that were as dark as possible. Bong State Recreation Area and the Yerkes Observatory were on my list of place to try. I utilize a program called startrails to combine a number of images that were captured at 30 second exposures, versus trying to use one super long exposure of man hours. The one quirk with the area I was filming was airline traffic, which adds additional streaks of light across the sky. I could go in and manually remove the steaks on individual images with photoshop before they are combined. but it doesn't bother me as much as some people. Here are some examples of star trail photography in south-central Wisconsin at the Yerkes Observatory."

From the West: This star trail shot was captured by using a flashlight to paint the observatory and the trees on a few images, and combine the rest of the star images to get the rotation.

Polaris Centered: On the south lawn looking back at the Yerkes Observatory to the North. The light squiggles on the the bottom are people walking around with flashlights pointed at the ground.

East tower lowwing at polaris: Also used a flashlight to paint the observatory and illuminate the East tower during this sequence.


*All images were combined using Star Trails from http://startrails.de/

Wednesday, September 8, 2010

DIY GoPro Chest Harness

Ever since I bought the Speedy Sewer sewing awl, I've got a few projects out of the way. In addition to the dSLR chest mount, I also created a harness for my GoPro HD Hero camera. GoPro does sell a chest harness, but I thought I could create one for much cheaper. Basically, I took the display mount that came with the camera and ground the edges down, plus cut slots in the plastic for the nylon to go through. Should be fun to try out Kitesurfing or snowboarding.


I ordered parts from Strapworks.com and was able to make this for around $16 after shipping, compared to the $40 GoPro is asking.


With the Camera attached...

This is my kitchen chair standing in as a display model.

Here's the view from the back. You'll notice I added a few release buckles on the shoulder straps.

DIY dSLR Chest Harness

FYI: This is not my original idea. I saw a post about a year ago when someone created a custom sleeve to hold their dSLR camera near their body to captures images of children's smiles as they are swung around in a circle. It was posted on a DIY photography forum and titled, "Give 'Em A Spin - A Fun Family Photography Project" Here is that original post. I had bookmarked that site, and forgot about it until just recently. Coincidentally, I had a birthday party to go to for a 6 year niece, and thought that I'd better get this project started.


I had some old neoprene laying around, and it isn't easy to sew, but is the best material since it contours to the shape of the camera when you have it strapped to your chest. Please note that there is risk involved with using any mount that allows you to "let go" of your camera. I suggest that you keep the camera strap that came with your dSLR around your neck in case it slips out of the mount. When I used mine, I never had the feeling that the camera was in jeopardy, until I got done swinging, and was a bit woozy.

Here is my neoprene sleeve. You can see I added a integrated "over the head" strap for added camera safety.


Here is a sample test image using the chest harness. My niece, Reece was happy to help me see if it worked.


Tuesday, August 17, 2010

Burrows: 08.15.10: Kiteboarding!

Wind out of the WNW on Sunday was unusually high and steady for August in Madison on Lake Mendota, and the Kiteboarders were out in numbers. I didn't have a lot of time to take pics, but was able to capture a few just off-shore.

Max is always my best model!


My dog Maximus has always been my go-to guy when needing a subject to photograph. We were on a weekend getaway to visit family and friends at a river cottage near Joliet, and I was able to capture Max running on a sandbar. Using my Canon 7D and the 70-200mm f/2.8 IS lens, I froze the motion and water splashing. Max still doesn't like to swim, but he is getting more comfortable in the water, and shallow water, he's a rock star!


Friday, August 6, 2010

Animoto Craziness!

Summer is a busy time, and very difficult to put together slide-shows. I've given Animoto another try, and have been extremely impressed with the multi-media slide shows that they come up with. Basically, I take my images, videos, and time-lapse sequences and upload them to Animoto.com and they spit out a slide show that has music and everything! I've gotten very favorable reviews from the wedding videos I put together using Animoto, and the fact that it saves a ton of time makes it very easy to recommend. Here is my latest video day tubing in Washington, captured exclusively on a GoPro HD Hero Camera.

Tubing down the Icicle River in Leavenworth, Washington  © Copyright m2 Photography - Michael J. Mikkelson 2009. All Rights Reserved. Images and Videos can not be used without permission.

Monday, August 2, 2010

Photoshop Saves!

Sometimes as a photographer, you're dealt with challenging lighting situations. Here is an example where I didn't have an assistant to use a reflector, and not enough time to go get a fill flash and umbrella. The sun is overhead, but behind the Bride and Groom. This is where Photoshop can save a mediocre to bad image, and make it a keeper.

Basically, I created multiple layers for this image for the different sections. Sky, Mountains, Couple, and Forest, and Grass. Using layer masks, I was able to tweak each of these sections individually to make the hue/saturation and levels look the way I wanted. The key to this image is also ensuring that you do not overexpose the shot, thus losing image detail. You'll notice in the original, the Bride and Groom are dark and you can't see their faces. In the processed image, they pop off the screen. Looking at this, I see that I have some sun flares/spots to deal with, but I think that it's a vibrant image that would have been overlooked. Using Adobe Lightroom as the final step allows me to create a vignette, reduce the orange-ness of the skin, and add back a bit of clarity!

Monday, July 19, 2010

Alien Skin: Snap Art - A-Scow and Capitol

Believe it or not, I still get requests to "Photoshop" images for people. Anyone who know's photoshop, this could be one of a million effects, filters, and/or actions. Luckily, he had an image that I already doctor'd up as a base. I decided to try a few different effects on this image, as they all have a slightly different feel once processed. Here are some examples using the Alien Skin Snap Art plugin using Adobe Photoshop CS5:


Pencil Sketch Effect:


Posterization Effect

Color Pencil Effect:

Oil Painting Effect:

As you can see, the same image can be transformed into art with different styles very easily using digital image manipulation tools.

Sunday, July 18, 2010

Thursday, July 15, 2010

Eric & Tracy's Destination Wedding!

I was lucky enough to be asked to help photograph the wedding of Eric Brown and Tracy Tompkins at the Mountain Home Lodge, in Leavenworth, Washington. Regan Van Huffel Botsford was the other photographer for the wedding, and you can view her fantastic work on flickr by clicking here. This was my first destination wedding where I needed to take a flight since 2009, and I've accumulated a ton of gear since then. I really tried to pack light, but ended up taking more than I needed to ensure that I captured this event for my close friend Eric properly. 3 Canon dSLR's, 2 GoPro HD Hero's, a Canon G11 with CHDK, and a Sony HDR-SR1 HD camcorder. The goal was obviously to focus on photography, but I wanted to try and expand my photojournalistic skills. The ceremony was captured from multiple cameras and locations. Here is the list of shots:
  • GoPro HD Hero on a Tripod using a Lawn Sprinkler timer as a panning device: Time Lapse
  • GoPro HD Hero on mini-gorrilla pod on lawn directly in front of the alter: 720p HD Video 60fps
  • Canon G11 on Tripod on elevated Deck (Right) running CHDK script: Time Lapse
  • Canon 7D on Tripod on lower elevated deck (left): 1080p HD Video
  • Sony HDR-SR1 on elevated deck: 1080i HD Video
  • Canon 50D with 70-200mm f/2.8 IS Zoom Lens: Monopod
  • Canon 5D Mark II with 16-35mm f/2.8 Zoom lens: -R-Strap
The goal with all of these angles and different media types is to be able to put together a slideshow with images, videos, and time lapse sequences, with music. Here is my first attempt at coming up with a worthy presentation:

Click on the image below to view slideshow with pics, video, and timelapse!

Wednesday, July 14, 2010

Star Trails!


I've been waiting for a chance to try star trail photography for quite some time now. I don't get out into the wild away from the lights of the city very often to get a good glimpse of the stars. I was really hoping that when I was in Washington shooting a wedding, that I would have my chance. Luck would have it, I got clear skies on Sunday night during a new moon, sot he skies were covered with stars. I had read about different approaches, and I had 3 dSLR cameras to play with, with 2 remotes. I discovered that stacking images works the best, and using 30 second exposures and a fairly wide aperature was the key. Here are a few examples.


This one turned out okay, but most of the images were out of focus. The end result after stacking them with StarTrails, was okay, but in the future, I'm going to ensure that I'm not trying to focus automatically, and set my focus manually. I may try and redo this one, as cars pulled up into the parking lot, and added a bunch of light to the building. I think I can pull those specific exposures out and re-stack. I also think that this one is more dramatic, as the camera is pointed towards Polaris, or the north star, and everything else seems to rotate around it.

This one was on a 7D, and not as wide of a lens, but the results is much sharper. You can see how many stars were out on this night, and I pressed the trigger manually on this camera after each 30 second exposure. Although it takes hours to get these types of results, it is definitely worth the wait.

Tuesday, June 29, 2010

New Panning Time Lapse Device: Lawn Sprinkler Timer?

I've been using a Stainless Steel egg timer that I bought off Amazon.com as a simple panning device for my time lapse sequences. The egg timer will rotate a full 360 degrees in one hour. I thought that having other options would be nice, and found a lawn sprinkler timer at the Home Depot that rotates 360 degrees in 2 hours. Basically, the rotation is half as fast. I bought one, and immediately dis-assembled it to see how it worked. The actual timer is very similar to the egg timer, so the gear ratio must just be different. I added a 1/4" screw, which is a standard size for cameras, to the top. Then I drilled another hole in the bottom to add a 1/4" screw and coupler, which can attach to any standard tri-pod fitting. I sawed the hose fittings off, and used a Dremel tool to smooth out the plastic where the fittings were removed. The lawn sprinkler seems more stable than the egg timer, and I'll be testing it out soon to see the differences in panning speed.


I'll post a video when I get a chance to test the new lawn sprinkler panning device.

Monday, June 28, 2010


Lightning photography has been on my list of things to attempt, but it's pretty much a waiting game and being at the right place at the right time. A line of storms rolled through Madison this last Saturday night, and I was able to set up shop overlooking the lake from the University of Wisconsin Lifesaving Station. Since I had never attempted this before, I took a few test shots, and ended up with some pretty good results. I set the exposure on the camera at 30 seconds, and kept the aperature at about f/6.3. Click the shutter and hope that lightening strikes. Here are a couple of good ones from Saturday night.


Wednesday, June 16, 2010

Renneckar / Sugar Wedding: Kite Aerial Photography


I was only able to get 2 sessions with the kite aerial photography rig during the Rennackar / Sugar wedding. Unfortunately, there just wasn't enough wind, and I was only able to fly with the GoPro HD Hero Camera. I was able to get a few aerial images to make me happy, but would have liked to put the G11 up in the air too. Here are a couple of samples from the first and last days.


Renneckar / Sugar Wedding: Light Art at Club Manitou!

I decided that I wanted to try out a technique called light art. Basically, you get in a dark area and set the camera to a really long exposure, and then you have someone use a flashlight to spell something out in the air, or trace something. Katie helped me, and we had a great time trying to figure out how to spell stuff backwards and seeing the results!


Renneckar / Sugar Wedding: Canoe-Kayak Time Lapse

The morning of the Renneckar / Sugar wedding, Darby and Tim planned a canoe and kayak outing going down the Crystal River in Glen Arbor, Mi. We utilized the Crystal River Outfitters and drove upstream about 6 miles. We had a group between 50 and 60 people and about 30 canoes and kayaks. I brought along the GoPro HD Hero and attached it to a different canoe at different locations. I created 2 time lapse sequences from the shots. One is a fast sequence, and the other is slightly slower with a cartoon effect.


Click on each image to watch time lapse video


Tuesday, June 1, 2010

Lake Mendota Time Lapse

I spent the weekend in Madison, Wisconsin working at the University of Wisconsin Lifesaving Station, and made it a goal to capture a number of time-lapse sequences. I had just finished creating a panning mount using an egg timer, specifically for the GoPro HD Hero camera. So in addition to capturing images every 2 seconds, the camera is also slowly moving from right to left. The sailboat images were captured with a Canon 7D on the roof of the Lifesaving Station, and show the 2010 Collegiate Sailing Team National Championships hosted by Hoofers Sailing Club and the the University of Wisconsin Sailing team.

Click on the image below to preview time lapse sequence

Tuesday, May 18, 2010

H8 eScow Regatta Time Lapse Photography

Using the Motorsports mount, I attached the GoPro HD Hero to the stern of the Sugar eScow at the Lake Geneva Spring Regatta this past weekend. Using the build in intervelometer, I captured over 8000 images at 2 second intervals. Using Adobe After Effects CS5, I created this time lapse sequence of the sailing race. Hugh Sugar, Time Sugar, Darby Renneckar, and Annie Newman were the crew aboard Gr8 Expect8ions. Click on the image below to view the movie.


Saturday, May 1, 2010

Making Strides Against Breast Cancer 2010

I went up to Milwaukee this morning to help support the Making Strides Against Breast Cancer, 2010 walk. The wind was out of the Southwest, and I decided to try a session on the kite, even though my last 2 trips to Milwaukee for kite photography were sketchy. Good wind, although gusty. Here are some of my favorites:


The Making Strides Against Breast Cancer walk started and ended at the Discovery World in Milwaukee. These aerial images were captured by suspending a camera to a kite. You can help by making a donation by clicking here.

Saturday, April 17, 2010

SEO Testing: Bristol Renaissance Faire

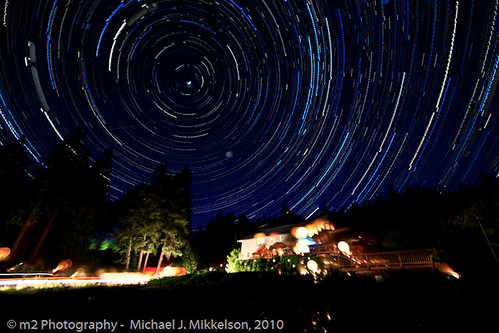
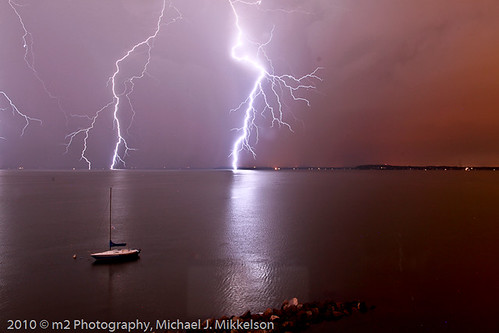
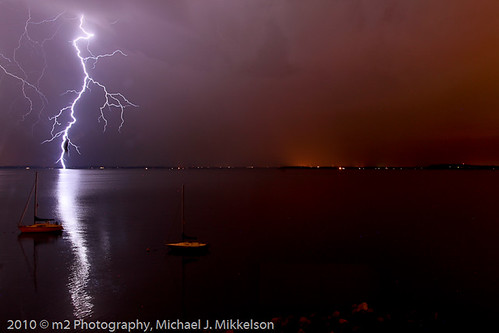
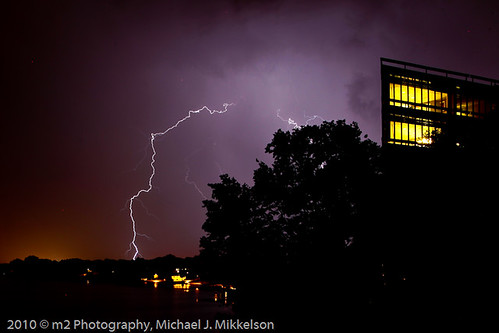
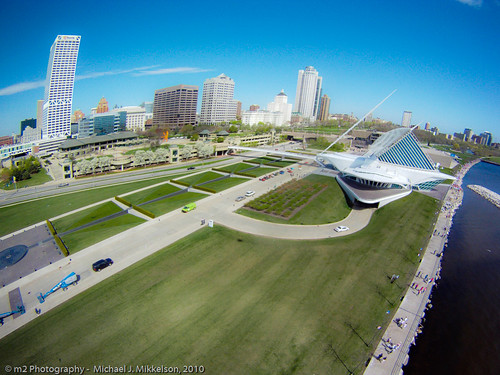
I am trying to get a handle on Search Engine Optimization, SEO for my photography website. I have thousands of images posted on my m2 photography site, and it's very difficult to get them to show up on Google. However, many times the same image posted on flickr, or linked from my blog, or external forums do show up in the results. I want to ensure that I'm doing everything possible to improve my ranking, and maybe gathering some ammo to take back to SmugMug for enhancement requests. There are forums specifically offering advice for optimizing your SmugMug site, and I have taken many of the tips and implemented them without seeing many changes in my searches through google. I thought I would perform some simple tests to see if any of my methods are working.


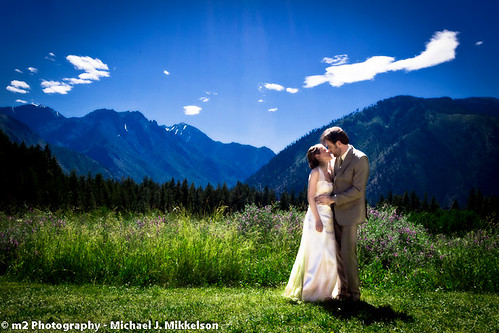
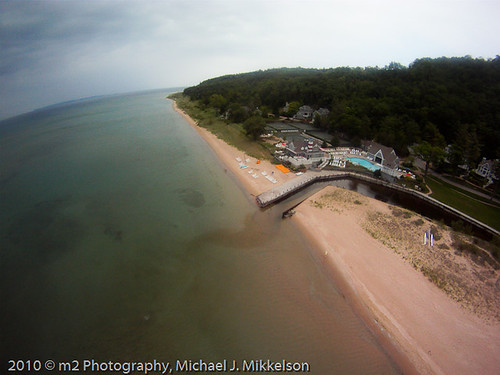
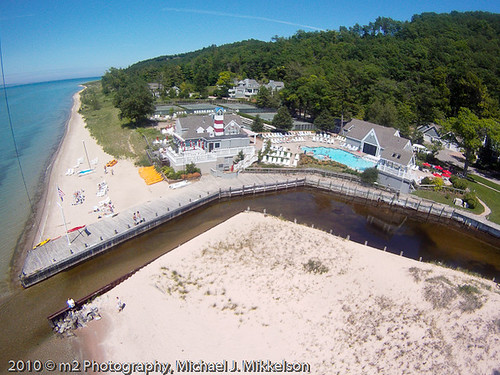
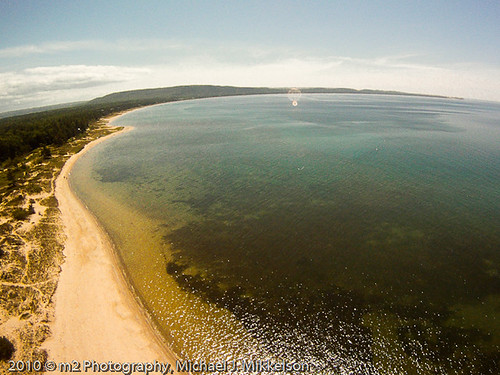
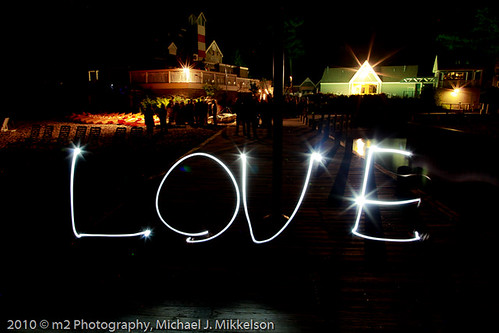
I have recently uploaded some of the same images to both flickr and my smugmug website. I will link to a couple of them here to provide some inbound links to the images.

Flickr image: Bristol Renassaince Faire Aerial Image Captured by a GoPro HD Hero Camera


m2 Photography image: Bristol Renassaince Faire Aerial Image Captured by a GoPro HD Hero Camera

You'll notice that I've been using as many hyperlinks in my post as possible, linking both to external sites and also back to my SmugMug and flickr accounts. It seems as though Google ignores the keyword meta tag, so visible content is king. Having other sites, such as this blog, facebook, and forums link back to your image is also very important. In addition to this blog, I will be posting links to the same images on facebook, and a couple of forums including dgrin.com, photography on the net, and also the Kite Aerial Photography forum.

The images on SmugMug and flickr have the same keywords, as well as this blog post. The file names are the same, but the titles on flickr have been changed. The description field for the gallery in SmugMug is similar to the description of each image in flickr. I tried to modify the caption in SmugMug for each image in the gallery, so that it's not using the same language for each similar image. SmugMug does not allow sitemaps, which is a huge disadvantage in the SEO game.

I will monitor the Google Analytics for my m2 Photography website, as well as perform simple search queries using Google to see what happens, and post my results here.


Results:
Day 1: Less than 5 hours after posting the original images, one of my images from flickr shows up as number one in Google when searching on "Bristol Renaissance Faire Aerial", which is pretty specific to my image. A few hours later, the first three results on Google are from flickr.

Day 2: I did another google search this morning, and the results are starting to get interesting. The number one returned item was my photos on flickr, but returned from a site called flickriver, which just displays flickr images with a different skin. The 3rd, 4th, and 7th, search results were all direct flickr links. The 2nd page of search results, at number 15, brought up my testing post regarding this issue on dgrin.com.

Day 3: 4 of the top 5 search results on google are Flickr or Flickriver. No SmugMug in site. :(

Day 4: 1st page, 4 flickr/flickriver results. 2nd page, Facebook, Dgrin post, and blog results. No SmugMug results up to 10 pages in.

Day 5: 1st 2 results are flickr. 3rd is my blog. 4th and 5th are flickr. Second page reveals dgrin and facebook. No results for SmugMug found.

Instructed by SmugMug to modify setting in Gallery so Google can find Gallery. Not exactly sure why this setting was off, as it's default is on, and other galleries were set this way. This setting is called "Hello World!" I made the change and have waited a few days to see if the results were any different.

Day 9: Flickr ranked 1 and 2. Blog moved up to 3rd position. Flickriver at 4 and 5. Page 2 of search results have Dgrin, Facebook, and Dgrin. Page 3 has my blog again. No SmugMug results found.

After 2 weeks: Flickr, Facebook, Dgrin, Photography on the Net, and KAP forum all returned results in the first 3 pages from Google. Nothing from SmugMug. My findings confirm what other users have been complaining about, and that the structure of the programming at SmugMug fails at providing any legitimate method for SEO. Unfortunately, they seem to re-hash the same links from dgrin on how to improve your rankings, which doesn't work. They need to realize that other sites have figured this out, and maybe, just maybe they need to take a step back and try something new. SEO is not an exact science. SmugMug is create for customizing online galleries. If you want people to search and find your images through Google, use something else.