Did an engagement photo shoot this past Saturday for a friend of mine on Willy Street near the Mother Fool's coffee shop. Matt and Carla wanted something a bit more "urban" and the brick walls on either side of the shop provided a colorful backdrop. I was using an on-camera flash with a light diffuser, with 2 off-camera flashes powered by PocketWizard FlexTT5's. Matt and Carla were standing in the shade in this picture, but is was a relatively sunny day. I thought that I would comment a bit on my post-processing work flow to show how I get results from the images I capture.
Canon EF 50mm f1.2 Lens shot at f/8.0 a 1/50th of a second, ISO 100.
Original Image:
This was taken almost immediately after starting the shoot. I don't like how centered they are, so the first thing I did was add additional rotation to accentuate the fact that she's on her toes, and crop the image down so they fall on the right 3rd of the image. I use Adobe Lightroom to modify the white balance and tone of the image, and then export to seperate folder.
Import into Photoshop and Run Actions!
Next, I open the image in Photoshop CS4. One of my favorite actions, is Totally Rad's Technicolor Dream World. Sometimes I will run this action in batch mode and modify the entire folder of images automagically. There are a few other actions that I use on a frequent basis, but for this image, I was pretty happy.
Final: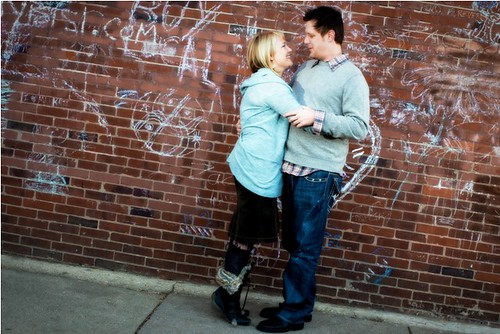
I re-imported the image back into Lightroom, and perform a few small tweaks. I add a little extra vignette, check the clarity, and reduced the saturation of Red in this image. Since we were outside on a pretty cold day, they both had more red in their ears and faces. I think that removing this and changing it to more of an orange tint makes the skin tones look more natural. I use the clone stamp tool, or whatever it's called in lightroom, to fix some blemishes, and I'm done! Honestly, with all the power of Lightroom and Photoshop, I could spend countless hours tweaking just one of these images, and get many different results.
Monday, December 7, 2009
Matt & Carla: Willy Street, Madison
Monday, November 23, 2009
GoPro HD Hero: Review
I received my shipment of the new GoPro HD Hero last Friday after a lengthy pre-order waiting period, and was dying to go out and test it. I plan on using this for kiteboarding, wakeboarding, windsurfing, and more specifically Kite Aerial Videography. Unfortunately, I am located in Wisconsin, so all of the water sports this time of year are out, and there didn't seem to be any wind in the forecast to be able to launch the kite rig for aerial footage. I did manage to test the unit with a few sessions using different mounts, but definitely not as extreme as the posted footage on the GoPro website. The HD Hero from GoPro Motorsports edition was $299.00, making in range for consumers as well as professionals to get theri
Specifications the GoPro HD Hero: (From the GoPro Website)
GoPro’s HD HERO Naked is the world’s highest performance wearable 1080p HD video and still photo camera. Professional quality 1080p / 960p / 720p HD resolutions record at 30 and 60 frames per second (60 fps in 720p). Record up to 2.5 hours on a single charge and up to 9 hours total on a 32GB SD card (not included).
The camera can also shoot automatic 5 megapixel photos at 2/5/10/30 and 60 second intervals during your activity, hands free. Press the shutter button once at the start of your activity and record up to 2.5 hours of poster-print quality photos of you and your friends, living it up.

Pictured here with Tripod Mount
Here is what I ordered:
- CHDMH-001 / HD Motorsports HERO **PRE-ORDER**
- GSHN5170 / Expansion Kit: Surf HERO (Expansion mounts. Camera not included)
- GRH30 / Accessory: Handlebar Seatpost Mount ( "Ride HERO" Accessory Kit )
- GTRA30 / Accessory: Tripod Mount
I purchased the Motorsports version of the GoPro HD Hero, along with the Handlebar Seat Post mount, which together came with an array of mounts in addition to the camera. I also got the Surf Hero mount that will attach to a windsurfer or surfboard. It's past the watersports season in my area, so I probably won't get to test this out until next summer.
The suction cup mount allows the user to attach to cars, motorcycles, snowmobiles, and cockpits. It is recommended for non-impact activities, but it seemed to have on heck of a grip on my car. It's pretty much made of of a hard plastic, but feels pretty rugged.

Pictured here with Suction Cup Mount
Sample Video Using The Motorsports Mount:
*Motorsports Mount on Front of vehicle, Handlebar / Seat Post mount on roof rack, and Motorsports mount on hood
Considering that I was planning on using this for Kite Aerial Photography/Videography, I want to keep weight down on my rigs. One of the first things that I did was go to the Home Depot and purchase some replacement 1" / 10-24 stainless steel bolts that require a #4 allen wrench. The included bolts are nice if you are going to use if for snowboarding, for example, and you need to be able to make adjustments without tools, or eliminate the need to remove your gloves. They seem a bit big and clunky. For me, I know that they are tightened and will not fall off when using the replacement bolts. Also, please note that the nuts included will all mounts are not standard sized*, and wasn't something that I could get from the hardware store. Hopefully, GoPro will stock these in the store. Replacing the hardware is definitely not necessary, and is only a person preference of mine.

Original hardware on the right, replacement bolts pictured on the left.
* The nut caps use a standard 10-24 thread, but the exterior of the nut is smaller than the standard 10-24 nuts at the hardware store.
I think one of the cheapest and most useful accessory to the GoPro HD Hero, is the Tripod Mount. Since the Hero has a proprietary mounting system, having the tripod mount** bridges the gap to other alternatives. I ended up using this on 2 of my Pole Aerial Photography rigs, as well as the mount for my Kite Aerial Photography rig.

Pictured here with on the tripod mount, with included hand-tightening bolt.

Pictured here with on the tripod mount, with replacement bolt.
** 1/4-20 (1/4" diameter, 20 threads per inch) socket for attachment to a tripod
The HD Hero is light enough to use on my xShot exendable pole in conjunction with the tripod mount. This extendable pole gets a different perspective and gives the user options when using the built in intervelometer for pictures, as well as the 60fps HD video at 720p.

Pictured here with on the tripod mount, using a xShot extendable pole.
*** This is not included with any option from GoPro. This is a 3rd party accessory you can use with the Tripod Mount
Since the Tripod mount uses a standard thread, you can use any of your existing photography accessories with the HD Hero, not just tripods.

Pictured here with on the tripod mount, with small Gorrilla pod.
*** This is not included with any option from GoPro. This is a 3rd party accessory you can use with the Tripod Mount
The Handlebar seat post mount is designed to fit on any tubes/frames ranging from 0.75" to 1.4" in diameter. I ended up not only trying it on my bike, but also clamped to my Yakima roof rack on my vehicle as an alternative to the Motorsports mount. The 3M adhesive mounts to be used on helmets or virtually any other surface, create a secure connection without worrying about having the camera fall off.

Pictured here with various mount, including the Handlebar Seat Post mount, Tripod mount, and a few of the different helmet mounts.
Here is a sample video of my Dog Maximus run next to me while I rode my bike. This showcases the use of the Handlebar Seat Post mount and Tripod Mount on an extendable pole.
My main purpose for buying this camera is to make an attempt to capture video, using my Kite Aerial Photography rig. The biggest problem with video from one of these rigs is the excessing amount of movement for the camera, making the user nauseated when watching the final video. Recent development of the GS-1 motorized servo for KAP rigs give a better opportunity for capturing video on a much more stable platform. The roll stabilization rig show blow doesn't eliminate all camera shake and movement, but it does a pretty good job at making it at least watchable. Using the 60fps option at 720p, it's plausible to capture aerial video that can be further stabilized during post processing.

Pictured here with Roll Stabilization rig used for Kite Aerial Photography/Videography.
*** This is not included with any option from GoPro. This is a 3rd party custom rig you can use with the Tripod Mount
Here is a link to the Kite Aerial Videography on the maiden flight of both the HD Hero from GoPro, and the GS-1 Servo Kite Aerial Rig. (Click here for Direct Link to Larger Version)
Click on image above to start video
The HD Hero camera itself is a cute little guy at 3.3 oz that is bare bones outside its case. There is a small LCD screen for modifying settings on the camera, but no built in LCD screen. They are obviously trying to keep the weight down on this and keep it simple. GoPro has future expansion packs listed on development agenda, including a LCD Bakpac and Endurance Battery Bakpak. I'm making a big assumption that both of these will need a replacement door for the existing housing to be able to fit the new hardware inside.

SD or SDHC Memory cards can be used up to 32 GB in size. The equates to over 4 hours at full 1080p, or over 8 hours in 720p resolution.

Making changes to the resolution, or any other setting on the HD Hero involves paging through the different menu options on the mini-lcd screen. I thought it very handy to have the resolution settings posted on the battery cover, so you don't have to Memorize the different settings. However, I feel as if I'll always be in r1, 1080p, or r3, which is 60fps 720p. The expansion slot is on the left in this image.

The camera has a USB 2.0 data connection which is used for charging as well as PC connectivity. Connectivity to a HDTV through component cables can be achieved with the included cables.

The battery is a rechargable lithiom-ion type with approximately 2.5 hours of battery life. I think that I'll need to get at least one more battery, as there will be many times where charging this won't be available. The future expansion bakpak is suppose to have double the battery life.

Although having a camera that can take pictures at a regular interval is nice, I doubt I would use this feature very often, unless creating a time-lapse movie. For me, I can do the same thing with a Canon powershot camera using CHDK, and get a better image. However, the intervelometer feature wout be used during helmet cam or sports activites. The most attractive part of this camera is the HD resolution options available.
- 1080p = 1920x1080 pixels (16:9), 30 fps, 15 Mbit/s data rate
- 960p = 1280x960 pixels (4:3), 30 fps, 12 Mbit/s data rate
- 720p = 1280x720 pixels (16:9), 60 fps, 15 Mbit/s data rate
- 720p = 1280x720 pixels (16:9), 30 fps, 8 Mbit/s data rate
- WVGA = 848x480 pixels (16:9), 60 fps, 8 Mbit/s data rate

Sunday, November 15, 2009
Hunting and Shooting with G9

Took Maximus out yesterday to do some Pheasant Hunting at Bong State Recreation Area. Max is not really that good of a bird dog, as he doesn't go more than 10-15 feet away from me usually. It would be nice if he ventured out a bit to kick up some birds. At least I don't have to actually shoot anything. I always bring my G9 camera just in case there is more action behind the lens instead of the shotgun.
Saturday, November 7, 2009
KAP and Real Estate Opportunities
Using Kite Aerial Photography is a great way to capture images for Real Estate Agents. I went to Janesville this morning to shoot a farm that is for sale. The real estate agent was thrilled with the results, and hopefully this will help with the listing. Here are some shots from this morning: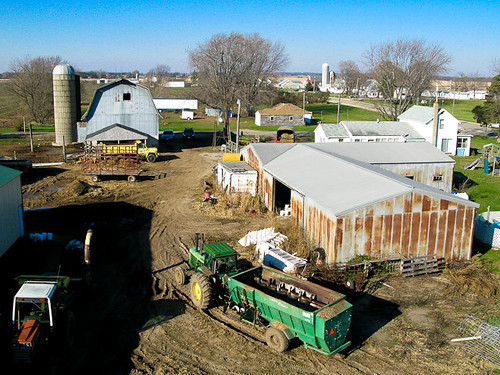

Friday, November 6, 2009
Motorola Droid:
I've needed a new phone as the buttons on my Windows Mobile phone haven't been working properly. I've been holding out for the new Google Android phone from Verizon Wireless called the Droid. Since the service with AT&T is really terrible in southern Wisconsin, I was never able to pull the trigger on the iPhone. I'm really excited about the Droid phone, and had to post a picture of it as part of my Stormtrooper project. "These is the Droid you're looking for!"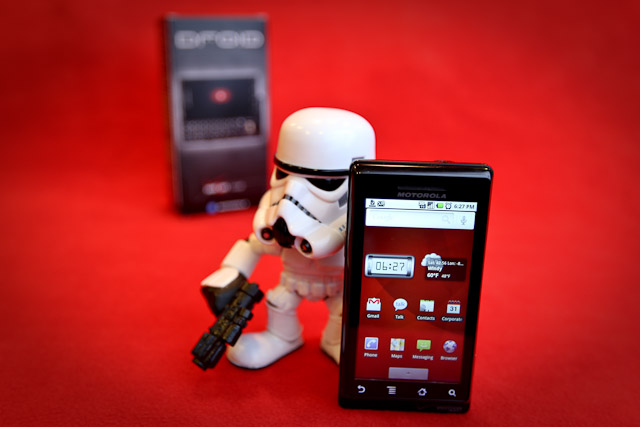
Sunday, November 1, 2009
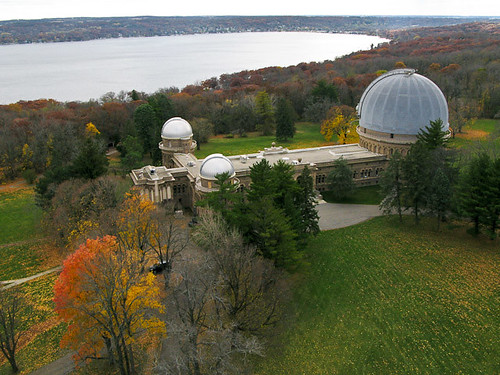
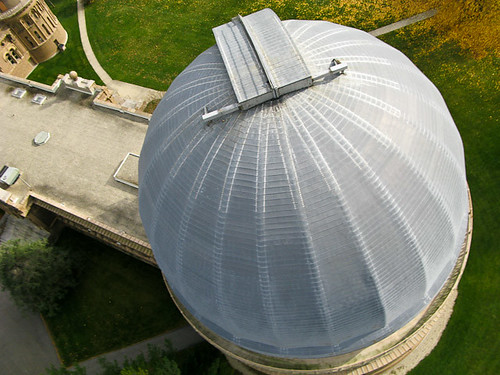
KAP: Yerkes Observatory
I got permission to go an photograph the Yerkes Observatory in William's Bay, Wisconsin near Lake Geneva using my Kite Aerial Photography camera. I saw this facility from across the lake the past summer during a sailing regatta, and though that this would be a great place for KAP. I totally forgot about it until recently, and decided that I would email the University of Chicago representative and let them know that I planned on coming out. It is a lot bigger than I expected, and the ornate details on the outside of the facility are superb. I would probably go back to photograph this just for the architecture of the property. It was very windy today, and extremely gusty, which make it harder to get consistent shots from the air. There was enough room on the property and adjacent golf course to walk the kite around to get different perspectives. The largest of the domes is 90 feet high. Now, I just need to add it to my list to view the building from the inside, and get a peek through the world's biggest lens type telescope!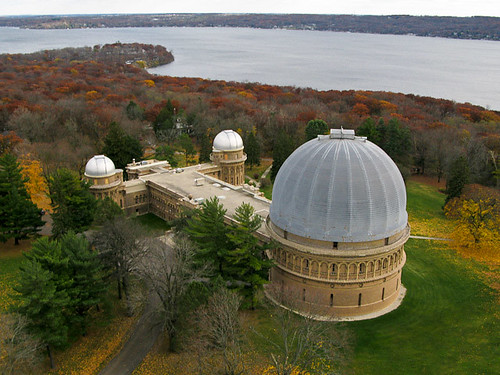
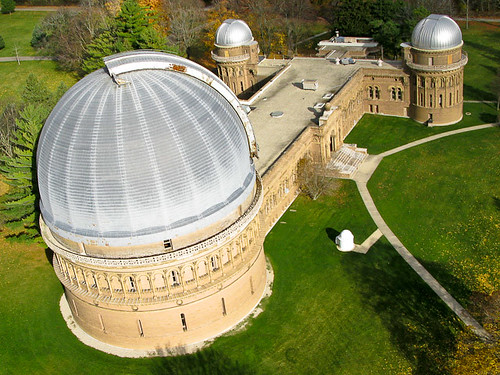
For additional images from the Yerkes Observatory Aerial Gallery, Click Here.
Monday, October 26, 2009
Animoto and Smugmug?
One of the new enhancements for SmugMug users is an integration with Animoto slideshows. I thought I would try one of their free 30 seconds spots and see how well it integrated into a blog post.
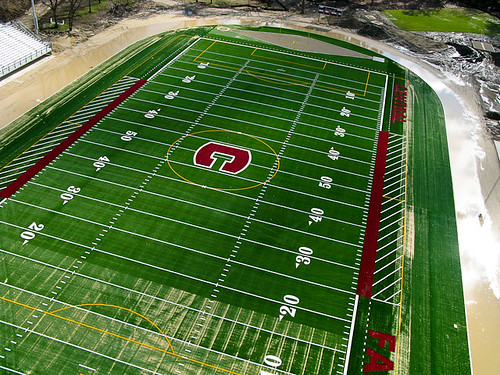
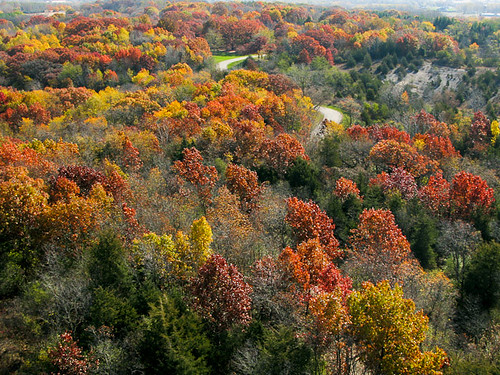
Busy Weekend: Fall Foliage Pics!
It was a very busy weekend, and was able to squeeze in 4 Kite Aerial Photography Sessions, and one photo shoot with my dog, in addition to going pheasant hunting, winterizing my boat, and working on a new website. The fall colors are good and starting to fade, so I knew that I needed to get out as much as possible.
There has been a lot progress since my last images of the new stadium in Paddock Lake for Westosha Central High School.
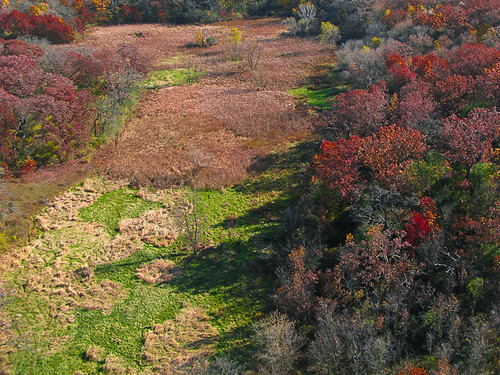
Wisconsin Fall Foliage:
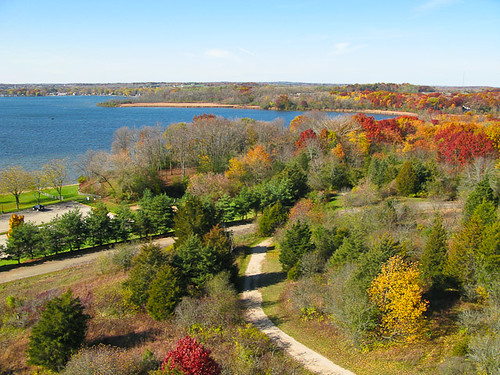
The 2005 remake of the Amityville Horror was shot at the big house on the far shoreline of this picture.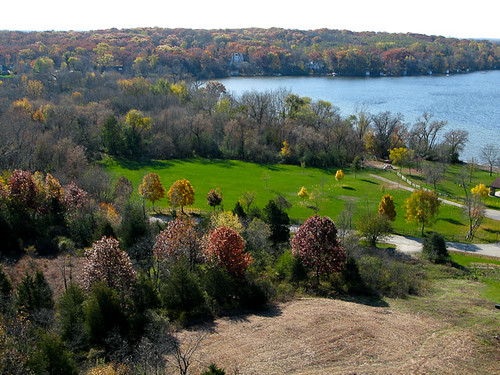
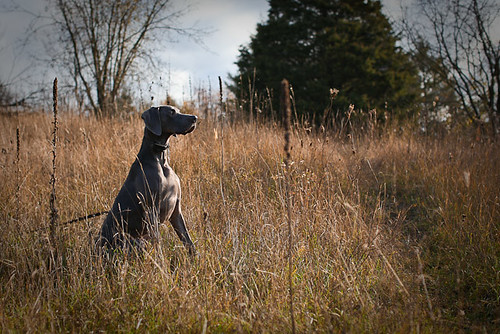
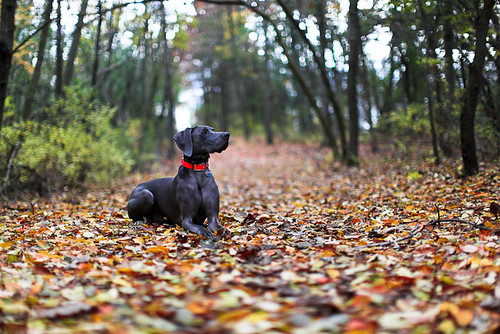
And finally a stroll through the county park with my Weimaraner, Maximus. He reluctantly poses for me, but the end results are worth it.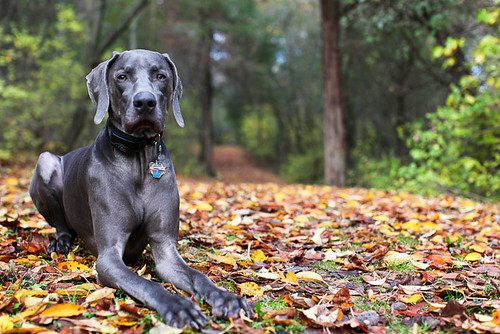
Tuesday, October 20, 2009
m2 Photography Hosting WWKP Website
I have been involved in the Kite Aerial Photography community through the online KAP forum for about 10 months. Recently, one member came up with the idea to have a token, Basically an object, that is passed from photographer to photographer with the condition that the token is captured in the picture from a kite aerial photography rig. Eventually, someone created a banner, which became the token, and the first few people took pictures of it from the sky. I had the idea that we should have a way to track this token as it makes its way around the world. I offered to create a website portal for this task: wwkp.kiteaerialphoto.org was born.
I already have web hosting, but have been looking for something cheaper. I signed up for an account on Fatcow.com, which is apparently 100% wind powered, which I thought was appropriate. I obtained the domain name, web hosting, and installed the Joomla portal. After tweaking and playing around with it for a day or so, we had a base site. Now the site is almost complete with some cool features. Google maps tracking of the token, and the other KAPr's locations. Integrated flickr module to show the pics that were uploaded to the WWKP Flickr group. And a blog for KAPr's to document their experiences with the token. As more people get involved, and more photographers have their day with the token, hopefully, there will be a lot more traffic on the site. Here are some screen shots of the new site:

Sunday, October 18, 2009
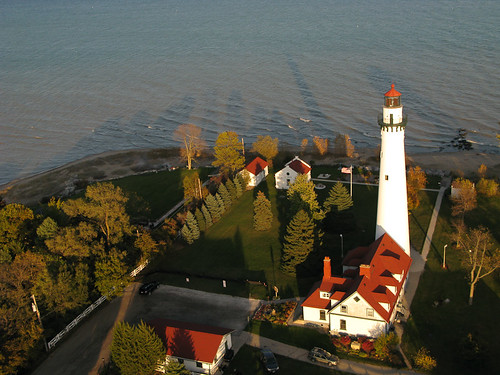
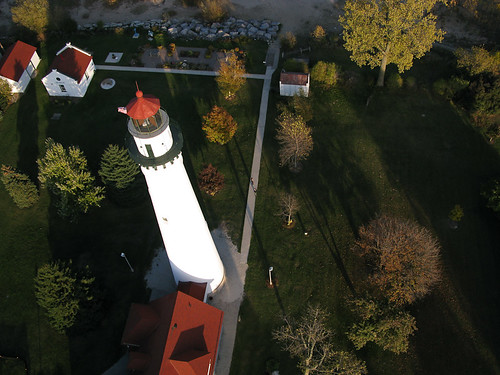
KAP: Wind Point Lighthouse
Got home from a weekend trip to Madison and still had some daylight left for some Kite Aerial Photography. I went up the the Wind Point Lighthouse in Racine, Wisconsin for some late afternoon shadows at the lighthouse with a spectacular Lake Michigan backdrop. I originally put of the Fled, but the wind was stronger above the tree line, and quickly replaced it with the Flow Form 16. Mike, the lighthouse keeper came out to see what I was doing, and ended up being my helper for the remainder of the session. The wind was really steady, ended up being one of the more rewarding sessions of the year. The lighthouse is 108 feet high, open once a month to the public on the first Sunday of each Summer month, and has been in operation since 1880.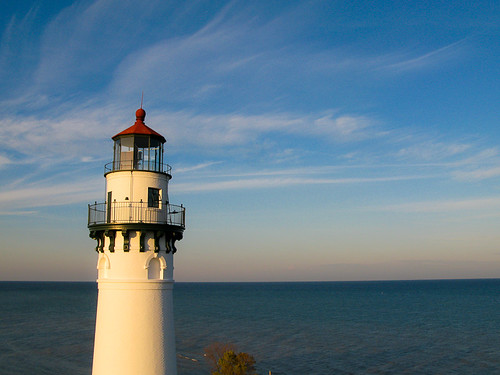

Click here for more images from this session at the Wind Point Lighthouse on Lake Michigan.
Friday, October 16, 2009
Eye-Fi / Mi-Fi / CHDK / KAP: Part I - The Rig
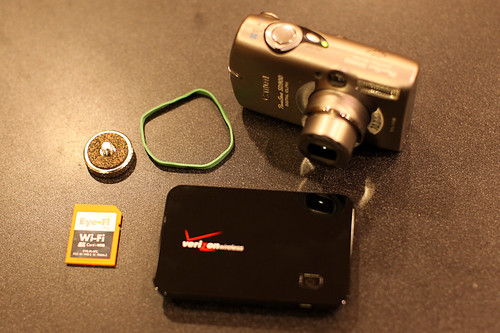
I've had ideas of being able to come up with a Kite Aerial Photography rig that could send the pictures back down to the ground without having to have a miniature spycam. Unfortunately, all of the methods I've come up with in the past ended up adding too much weight to the rig to make it practical. Along comes the Eye-Fi pro wireless SD Memory card teamed with a Verizon Mi-Fi broadband internet card, and you have a mobile solution that could be used for KAP. By itself, the Eye-Fi card does not have enough range to be useful to KAP. Adding the battery powered Mi-Fi device, and you have a portable internet connection that you can send along with the KAP rig as it is lofted to the sky.
What is needed?
- CHDK loaded on Eye-Fi SD Card
- Canon Camera that allows loading CHDK firmware from the Play menu. (There are other sites that show you how to hack the Eye-Fi card with a utility knife to add the notch in the card necessary to lock the device for standard CHDK to work. My Canon SD900 Camera can load the CDHK firmware by starting the camera in the Play mode, pressing menu, and performing a firmware upate, and switching to Capture mode.)
- Verizon Mi-Fi Device (Sprint Mi-Fi would also work)
- Velco and a Rubber Band
- KAP Rig (Brooxes.com)
I started by placing velcro on the back of the Mi-Fi card and on the rear plate of the Brooxes Basic KAP Kit.
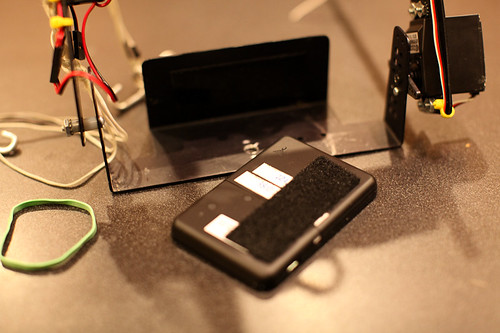
In addition to the velcro, I have added a simple rubber band to ensure that the Mi-Fi device stays with the KAP rig.

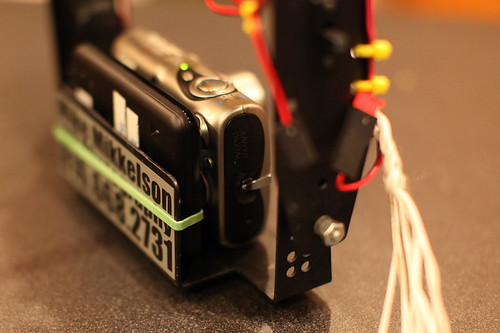
With the Camera attached, you can see the Mi-Fi card fits snugly behind and should have excellent reception to the eye-fi card in the camera.
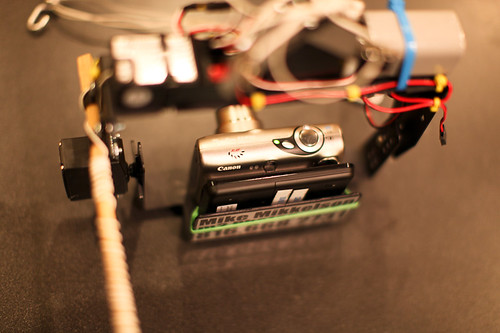
Here's another view from above of the entire rig, focusing on the Mi-Fi card attached behind the Canon SD900.
Now, I am in a unique position to have an additional Verizon broad band card built into my laptop. Now, most people probably don't have access to one, let alone 2 verizon broadband connections. I'm thinking that the Mi-Fi device is somewhat limited to distance, just like the Eye-fi card, but you might be able to send the kite up 100 feet and still be able to connect with it. My plan is to have my laptop on the ground create it's own internet connection and watch the pictures as they are uploaded from the secondary Mi-Fi card. Currently, I have them set to upload to my Smug-Mug account and a private Gallery. However, you could use Flickr, Gallery, Picassa, or a number of other online sites, and have an almost real-time KAP web cam. The upload speed on the Mi-Fi card is the limiting factor, and it's probably going to be a good idea to have the KAP script slow down, and only take pictures every 30 seconds or so.
I plan on testing this new KAP / CHDK / Eye-Fi / Mi-Fi / Wi-Fi setup the next time I go out to do KAP. The goal is to be able to see the pictures from the camera without having to bring the kite down and downloading the images off the Memory card.
Wednesday, October 14, 2009
KAP @ Lunch Today
I've been waiting for a windy day to get out and do some Kite Aerial Photography. Unfortunately, it's gotten really cold in Southern Wisconsin / Northern Illinois, and everything is turning brown. Decided to try the Metra Station next to a park in Round Lake Beach during lunch. I heard the train coming, and tried to get in position to get a few shots as it went by.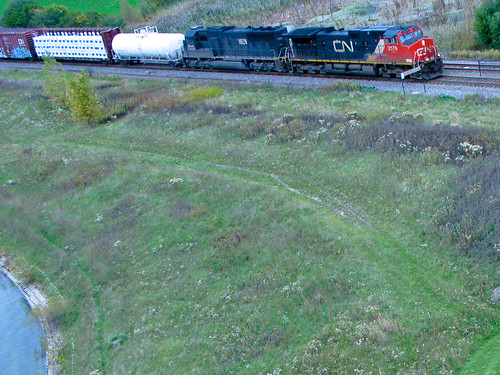
Additional images from this session can be found by clicking here.
I'm really hoping for some wind this weekend, as I'll be in Madison for the Badger game. it would be nice to get some aerial lake shots before the color is completely gone.
Tuesday, October 13, 2009
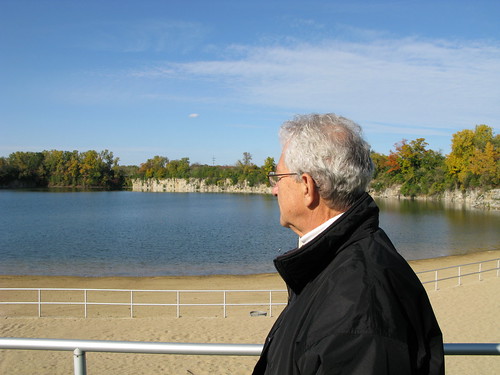
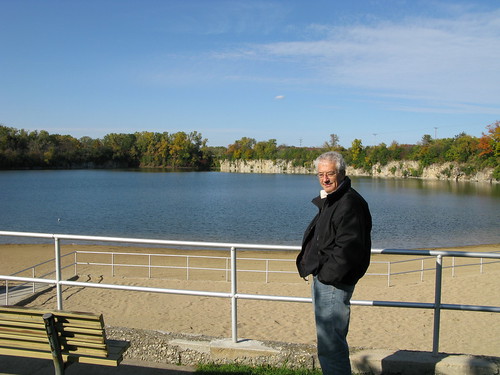
Quarry Lake Park: 50 Years Later
My parents were in town visiting from South Carolina recently, and my dad wanted to take a trip to Racine to view some of his former hangouts while growing up. We visited the bar that my grandparents owned, which is now a corner beauty store, the house where my grandparents lived, and his former high school. However, the most nostalgic destination was the Racine Quarry where my dad use to swim and dive each summer. The quarry has been completely filled, about 20 feet up from where it was back in the day. I remember him telling me about this place when I was younger, and it was great to actually see. He told of how the quarry was closed because a girl was killed after a fight broke out between 2 guys, and a shard from a broken beer bottle accidentally severed her jugular vein. We visited the place where he used to dive off, and said that it was about 20 feet back then, and the cliffs across the lake were close to 40 feet up. He thinks that the water is at least 120 feet deep. The water wasn't as clear as he remembers, but I think that this is a popular scuba diving location in SE Wisconsin. I snapped a few pictures while we looked around the swim area that was new to him. My dog Max got some great exercise running around on the man-made beach. He mentioned that besides the water level and the new swim area, it looks exactly the same. I wonder if some of my childhood haunts will be that vivid to me, or will the memories fade over time. Hopefully, these images will help preserve the memories, or be able share them with his brother who also frequented the Quarry.