Tuesday, June 14, 2011

WWKP Banner Movie

I created an animoto video of the World Wide KAP Banner, using multiple photography techniques including time lapse, stop motion, panoramic, and video. The banner was delivered to the next kiter last Sunday, and the journey for the KAP token continues...

Click on image above to view video

Monday, June 13, 2011

2 Aerial Photographers in Madison

I was in Madison yesterday for a photo shoot to fulfill the charity auction donation m2 Photography gave to the Wisconsin River Alliance last year. I used this opportunity to hand off the WWKP banner to Craig Wilson. The cool thing about finally meeting Craig, was that he was one of the reason's I got into Kite photography a few years ago. I brought my copy of Craig's book, Hanging by a thread: A kite's view of Wisconsin, and he was nice enough to personally sign it. He also was very cooperative in helping me finish up filming a project that I did with the WWKP banner. We also posed together with the banner.


Saturday, June 11, 2011

World Wide KAP Project

The Kite Aerial Photography community forum started a project in September of 2009 where a large banner was created and started in the Netherlands. The goal for each person who has the banner is to sign it, and capture a photo of it using Kite Aerial Photography if possible. Then the banner is sent to the next person. So far, it's been to Europe and South America. I received the banner last week, and am the first person in the United States to get it. I think because I was the editor of the World Wide KAP Week book last year, I got preferential treatment. There are probably well over 100 people around the world that still have yet to see the banner, and it's my plan to hand it off to Craig Wilson in Madison on Sunday, June 12, 2011.


I was also fortunate enough to have a windy day on the first day I got the banner. With the help of my friend Mac, we met down on the lake shore of Lake Michigan by the Kenosha harbor lighthouse. It was extremly hot that day at 97 degrees, which was the reason for the southerly breezes. It was Mac's job to hang the banner from the lighthouse, while I drove to the other side of the canal, and launched my kite. I had stopped and picked up some additional magnets thinking that the banner would be easy to hang from the metal lighthouse. However, with layers and layers of paint, Mac explained that it was tricky, but barely hung on. Unfortunately, Mac who is also a photographer, forgot to put memory cards in his camera before heading out to the lighthouse, so we don't have any close ups of the banner on the lighthouse.

It was getting close to sunset, and boats were returning to the harbor, so I was lucky enough to capture a few boats as they went by. The winds were strong, and I chose a new Brooxes rig I had just bought for the Canon G11, and my lightweight rig for the GoPro. Here are some examples from the KAP session over the channel:


When the banner arrived from Argentina, the previous KAP'r put a postcard from Buenos Aires in the package along with the banner.

While I'm in possession of the banner, I thought I would try to capture images of it, even if it wasn't from a kite. I cleared out my living room, and set up my motion dolly to get high resolution images of the banner to stitch together in a giant panoramic image.
Click the banner to view high resolution image with signed comments from around the world.

I wasn't sure what I should put on the banner, but my wife Katie suggested that I use the boat wheel that we use at the UW Lifesaving Station as a logo, as my design. I put my forum name, the date, and my web address. I used fine point sharpies which should last, as a couple people did not use permanent markers and those comments will eventually fade away...

I decided that I wanted to take some more images of the banner before handing it off tomorrow, so I went to 2 of the Welcome to Wisconsin signs nearby. The one on highway 45 has a better backdrop and flowers planted and turned out nice. It's not Kite Aerial Photography, but a camera attached to the top of a painters pole to get that Aerial effect. When there is no wind, you find other options.

Once I release the banner, I probably won't see it again for at least 10 years, as it will take that long to get through the entire list of Kite Aerial Photographers. However, there is a flickr group where you can see images as people take them. This is a fun project, where each person has the creative task of getting a picture of the banner from a kite, somewhere in the world. Hopefully, as the start of the US tour, I've accomplished my goal and have represented Wisconsin well. I have a little side project that I've been working on while I've had the banner, and plan on posting that after I hand it off in Madison. Plus, who knows, I may get some additional inspiration tomorrow morning and get some more images. Since I'm meeting Craig Wilson for the first time tomorrow in person, hopefully, he'll sign my copy of Hanging by a Thread: A Kite's view of Wisconsin.

Monday, May 9, 2011

DIY: Ladder Dolly - Motorized Time Lapse Photography: Part II

Part II:


I finally gathered all of the remaining parts to complete my slow motion ladder dolly. Although the dolly worked fine, I wanted to add a few features like:
  • Limit Switches: This will ensure that that dolly stops when it gets to the end of the track.
  • Forward/Backwards switch: An easy on/off switch that also changes directions
  • DC Motor Speed Controller - Potentiometer: Allows me to slow the motor down even further
Again, most of these ideas came from the DIYPhotography.net post here. The biggest difference is that they made their own collapsible track, and I'm using an extension ladder as mine. They also use a timing belt, where mine just wraps fishing line around the axle. Here are some updated images of my dolly:

I mounted the battery by using the bungie cord off a couple of ball bungies to hold the battery down. I'm probably going to add a bracket to the back to ensure it doesn't slide off if I'm doing a steep incline. I also replaced the T-Nuts on the sides of the dolly from the ones that just had the teeth, to the ones that had screw holes. This should ensure that no matter how many cameras are mounted to the top, the wheels will not buckle.

I used an aluminum hobby box which was purchased at Radio Scrap, and tried my best to solder and heat shrink all of the connections.

I've also added a bunch of 3/8" and 1/4" screws sticking out of the desk in various locations. This will allow me to have up to 4 mount locations for my Ball Head holding a dSLR, and 6 possible locations for the GoPro or Canon G11 on a standard mount. I have a coupling nut on the rig in case I want to use my Manfrotto flexible neck mount to get some "looking straight down" shots.

I put a limit switch on both sides, to it will stop when it gets to the end of the track going in both directions

The guts of the Potentiometer are also inside the Aluminum housing, and allows the rotation to be extremely slow. I'm planning on putting the dolly on the ladder track this weekend to see how slow I can make it move.

Sunday, May 8, 2011

WWKW - Worldwide Kite Aerial Photography Week

Worldwide Kite Aerial Photography week is now over. I was able to get 2 sessions with the kite in the past week. WWKW is a collaborative effort by the users of the KAP forum to actively get out and capture aerial images around the world. These images are posted to a flickr group, and a book is created each year. I was editor last year, and am glad to not have that responsibility again.


My first session was at the Russell Military Museum, which I posted about last week. Yesterday's session was much more enjoyable, with a steady breeze on the edge of using my FlowForm 16, but decided on the FlowForm 30 to ensure I'd be able to fly multiple cameras. I ventured out to the Bong State Recreation Area nearby to where I live, as I notice a huge "X" on the ground while browsing Google Earth. I figured that this was as good a spot as any, as the Bong State Park was originally purposed as a jet fighter base which was cancelled at the last minute. You can still see where the runway was suppose to be. Here are some favorites:

X Marks the Spot

Wisconsin Farmland

ATV Riding
Bong offers space for many activitys, including dirt bike and ATV trails. There was a group also setting off model rockets, as well as a model airplane runway. It's a popular place for bird hunting as well. My dogs love being able to be off-leash and run through the brush.


Sunday, May 1, 2011

DIY: Ladder Dolly - Motorized Time Lapse Photography: Part I

Last summer I really started to enjoy creating time lapse sequences using the GoPro HD Hero, Canon G11 with CHDK, and also my Canon dSRL cameras with external trigger. I also purchased the Gadgetworks Automate, which allows me to create panning time lapse sequences with a dSRL with an Android phone. I like tinkering, and created a couple of DIY panning devices for the GoPro HD hero and CHDK cameras by hacking an egg timer and also a lawn sprinkler timer. These are great for slow rotation during a time lapse sequence. When I started to see DIY motion dolly's popping up on the internet, I knew that I had to make one for myself. I didn't just want to create something I could use for smooth video panning, but for super slow motion panning for time lapse sequences. I got my latest inpriation from the DIYphotography.net website, and a number of similar projects they created:

I modeled my dolly after their Mini-Rail slider, which can be seen here. The biggest difference is that my dolly slides on an extension ladder that I already had, so it's a bit bigger and can carry multiple cameras. They created the rails for their project. The ladder just seemed easier to me, but it's definitely not as portable. The concept of using scooter wheels with bearings is the same. I also was inspired by an additional post where someone created a system that pulled the dolly along the track using gear motors, which can be seen here. I purchased my parts from ServoCity.com, and used a few parts that I had lying around. I also ordered a new ball-head to mount on the dolly, but I'll also use it on my monopod. I decided to make my project come together a little easier by getting a gearbox that would slow down the rotation of my motor.

You don't need a gearbox to complete this, but it definitely made my project easier. I am still waiting on a few parts, so for now, there is an on/off switch, the gearbox, and a small 12V battery, which was purchased from Horizon Hobby to run the motor. I purchased 2 motors for this project, but for the initial tests, I used a 3RPM motor. With the gearbox differential, it corresponds to about .355 rotations per minute. I'm waiting on a DC Motor Speed controller/Potentiometer that is en-route, which is the same one that they used in the "Building an Amazing Super Versitile DIY Time Lapse Dolly" on the DIYphotography.net website.

First, I created the Dolly using plywood, T-nuts, and Razor Scooter wheels. I went with a simple design where the wheels on the sides sit on top of the ladder, and the wheels on the bottom ride the inside rail of the ladder as it goes up the track.

I also plan on using the dolly with my dSLR cameras, as well as the GoPro and G11 with CHDK, so there are multiple holes drilled in different locations on the board for mounting. My first outdoor test with the dolly, I was using a Canon 5D Mark II, and 2 GoPro Cameras.


I used t-nuts and lock nuts to mount the wheels with the ability to tweak the distance of the wheel from the dolly board. Once is was fitted to the ladder, this should never have to change.


I mounted the gearbox and motor to the front of the dolly. The battery is still not permanently mounted, but I wasn't doing anything that wasn't level in my tests. In my design, fishing line with 50lb test is mounted to the shaft of the gearbox, with the other end of the line tied to the furthest rung of the ladder. As the gear turns, it wraps the line around the axle, and pulls itself along the track. Other designs use a threaded rod attached directly to the motor, the moves the dolly up the track as the motor turns the threaded rod. Since I'm using half of a 28 foot ladder, I wanted to ensure portability at least for the dolly. The ladder can be mounted to the rack of my car for transport.

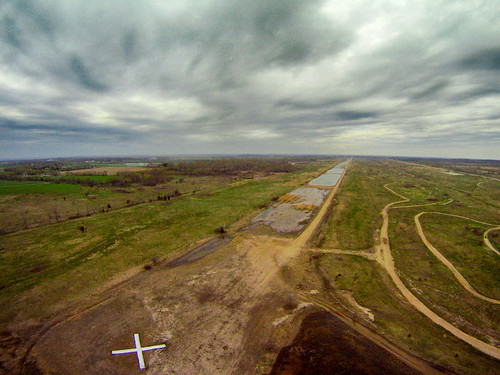
Here is an aerial view of the dolly with my Canon 5D Mark II, and a GoPro HD Hero camera mounted. The camera taking the picture is also a GoPro HD Hero mounted on a Manfrotto Flex neck mount, which will be nice if I need to extend the camera out over the dolly.

To get a better idea of the gear box, here is a picture from a time lapse sequence during the initial dolly testing. You can see that the string has started to coil around the shaft. The phone is being used as a stopwatch so I could calculated the speed at which the dolly moved up the ladder at full power. Once I get the speed control parts, I'll be able to make it move even slower.

The initial test, conducted inside my living room because I couldn't wait to see if it worked, showed the the dolly moved 9.16 feet in 4 hours, or about 5.67 hours to traverse the 13 feet of usable track. Once the DC Speed Controller is added, I hope to create 12 hour time lapse sequences going the entire length of the track, or slower.

Using Adobe lightroom to fix the white balance on the GoPro HD Hero images, and Adobe After Effects to create the time lapse sequence, here is the first text of the DIY Ladder dolly in action. The phone was used as a stopwatch, and the images were captured at 30 second intervals.


Click on image above to watch video

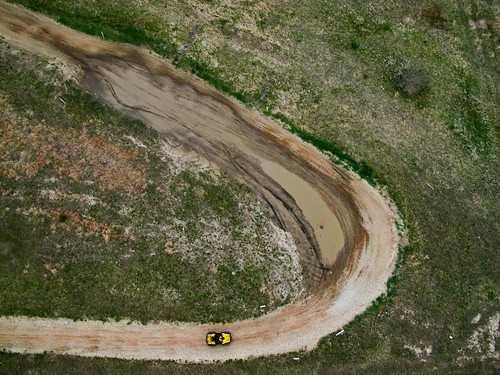
My wife had a busy day getting a yard/garage sale going, and I needed to get some other yard work done, but not before setting up the ladder dolly for some outdoor tests. Here is the video capturing a bird's eye perspective of the dolly as it moves up the ladder.


Click on image above to watch video

The GoPro is a great camera to get time lapse sequences, as it already has an intevelometer built in, and since it's very light weight, it doesn't hurt attaching another camera to the dolly to get a second perspective, especially since the GoPro is wide angle.

Motion Ladder Dolly - Outside GoPro Test Run  © Copyright m2 Photography - Michael J. Mikkelson 2009. All Rights Reserved. Images can not be used without permission.
Click on image above to watch video

To get a real sense of how I would use this on time lapse projects, I grabbed the Canon 5D Mark II with a Coken graduated filter, and the external trigger timer, and attached it to the new Manfrotto ball head, which was attached to the dolly itself. Here is the end result:


Click on image above to watch video

The biggest problem with this design is the once the fishing line is coiled on the shaft, you either have to run the motor in reverse with the ladder at a high enough angle to allow gravity to pull the dolly back. Or, you have to manually unwind the fishing line, which takes about 10 minutes. The gravity trick is nice, but it also takes the same amount of time to unwind as it did to wind. I've also ordered some limit switches and plan on wiring this so that the dolly stops when it gets to the end of the track by cutting power. There could be some damage to the camera, gearbox/motor, or dolly if you forgot to turn it off, and the line kept coiling. Overall, I'm really impressed at how smooth the dolly moves on the ladder, which will be nice if I ever decide to use it for video.


I selected this post to be featured on my blog’s page at www.photography-blogs.org.

Saturday, April 30, 2011

KAP: Russell Military Museum

In one of my most stressful Kite Aerial Photography sessions ever, I was able to walk away with images of the Russell Military Museum, which is on the border of Illinois & Wisconsin off of Interstate 94. I've driven past this a hundred times, and always thought it would be an interesting place to capture from the air, as it's a visual graveyard of military vehicles.


The wind was strong and somewhat gusty, and was able to loft 2 cameras into the air. Unfortunately, it was close to sunset on a cloudy day, and Wisconsin is still pretty brown with some green peaking through into spring. The wind was much strong once the kite was high int he air, and took a bit of effort to get the cameras and kites back to safety. Here are a few of my favorites from today's session.


To view the entire gallery of aerial images of the Russell Military Musuem, click here.