Friday, April 15, 2011

DIY LED Rope light to create light art orbs.

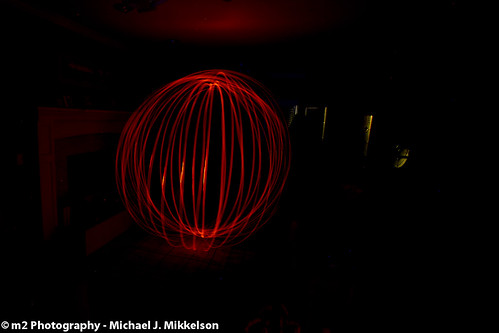
Some of my favorite images are of light art using flashlights and long exposures to create some interesting pictures at night. I've seen a few tutorials on the new on how to create a light rope using LED's, which then can be used to make glowing orbs in photos. I decided to get out the soldering gun, and try one for myself. I changed the designs I saw to encapsulate the batteries and power toggle switch inside a babies bottle for better grip, and RCA photo plugs to enable changing LED colors in the field to be able to use the same power source.


Here is my first test shot standing in my living room, twirling the rope light and walking in circles. I'll need to tweek my technique, but think that this will work great this summer at a few locations shooting at night.


Wednesday, March 30, 2011

GoPro Battery Life w/ Accessories!

I've been a huge fan of the portable GoPro HD Hero Cameras for capturing images from a number of different sports, events, and also Kite Aerial Photography. GoPro has been developing some interesting accessories for the HD Hero camera, including the new LCD BacPac and Battery BakPac. The LCD BacPac allows you to view what you plan on capturing in real time, and also play back the images and video you've also recorded. The Battery BacPac allows you to add an additional GoPro battery to almost double your recording time. I thought it would be interesting to actually test the life of the GoPro when adding the accessories, and document the results here.
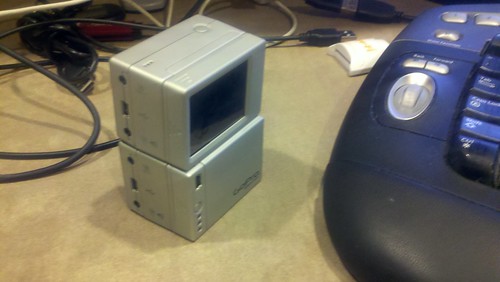


As you can see from the 2 GoPro HD Hero cameras stacked up together above, the Battery BacPac is a bit more Chunky than the LCD BacPac. GoPro includes additional rear-case doors to accommodate the extra girth.

All tests were conducted using a 60 second intervelometer, or the PES setting on your GoPro HD Hero. I also added a third party portable battery pack to the tests to see the limits of what you could do in the field. Here are the results:

HD Hero Alone
Number of Images: 222
Battery Life: 3 Hours 41 Minutes

HD Hero with LCD BacPac
Number of Images: 95
Battery Life: 1 Hour 33 Minutes

HD Hero with Battery BacPac
Number of Images: 382
Battery Life: 5 Hours 38 Minutes

HD Hero with Battery BacPac and External Kensington Ultra Portable Battery Pack (USB)
Number of Images: 614
Battery Life: 10 Hours 14 Minutes

As you can see, you do not get double the life out of the GoPro with the Battery BacPac, but almost. The times above will almost certainly change for capturing video, or increasing the intevelometer setting. Using the LCD BacPac will significantly reduce the usable time for your GoPro, but being able to see what your shooting is necessary. My goal is to create a 10 hour time lapse sequence, ending right after sunset, and using a motion timer to track the sun across the sky. Look for that video this summer!

UPDATE: Invested in a new battery backup device from NEW Trent, the iCruiser IMP1000 11000mAh External Battery Pack and Charger. I wanted something with a bit longer charge than the Kennsington Powerpack. This unit is a beast, and is thicker and heavier than the Kensington. Interstingly enough, the product description said that you could obtain 17 hours of movie watching time on an iPad 2! I decided to put my GoPro HD Hero to the test configured with a 30 Intevelometer, and the Battery Backpack. Here are the results: HD Hero with Battery BacPac and External New Trent iCruiser Battery Back (USB) Number of Images: 3,946 Battery Life: 32 Hours 52 Minutes


Sunday, March 13, 2011

Tabby Ruins Star Trails

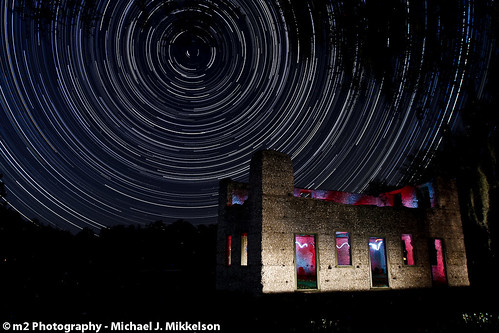
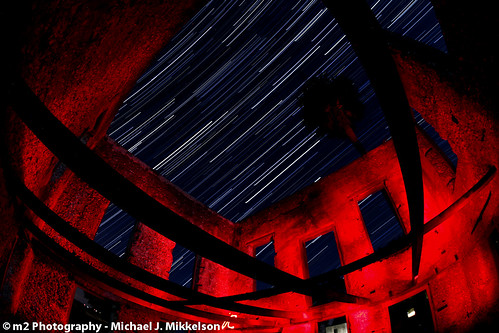
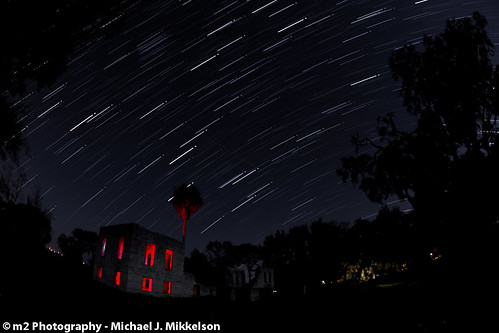
I was back in South Carolina visiting family, and decided to head back to one of my favorite destinations, the Tabby Ruins on Spring Island. The forecast showed that clear skies were predicted, and compared to what I was used to in Wisconsin, decent temperatures. I loaded up the camera gear and the dogs, and headed out to the island after dark. The intent was to set up 2 cameras and capture a series of images to combine into star trails. I used the software, StarTrails to combine the images, which makes it much easier and faster to get the desired result.


All images were 30 second exposures. I also used a LED headlamp and red LED flashlight to paint the ruins to get some interesting effects on the inside and outside of the buildings.


Monday, March 7, 2011

Bikram Yoga! It's HOT!!!

My friend Maura has been dreaming of opening a yoga studio in Chicago for a few years now, and it's finally come true! Bikram Yoga Chicago South Loop opened its' doors today, and had a special VIP night last evening for friends to preview. I had been asking Maura if I could photograph her doing yoga a few times, and she invited me to capture the event. I brought a fellow photographer, Mac Petras, to help. The thing about bikram yoga is that it's done in a hot room, at 105 degrees. Not only were their physical challenges, but equipment issues as well.


Since this was a special event for Maura, I wanted to try a few things to capture not only photographs, but video and timelapse as well. We put our camera in ziplock bags and stuck them in the hot room about 40 minutes before the event so that the cameras would get acclimated to the room. Seemed to work fine, as we didn't have any fogging issues, only sweat pouring, and we weren't even working out. I only did one lens change, and stepped out of the room to do that and didn't have any issues with fogging. I'm still previewing the pics, and grabbed a bunch of favorites and whipped out a few time lapse sequences and video. One of the GoPro cameras was mounted upside-down, and attached to a lawn sprinkler timer and Gorrillapod to get a slow panning time lapse of one pic every 2 seconds. Then upload to Animoto,and Viola! Just love how this service takes the effort out of creating interesting fusion sequences. Enjoy!

Click below to preview video:


Wednesday, March 2, 2011

Tabby Ruins & Links: PAP & KAP

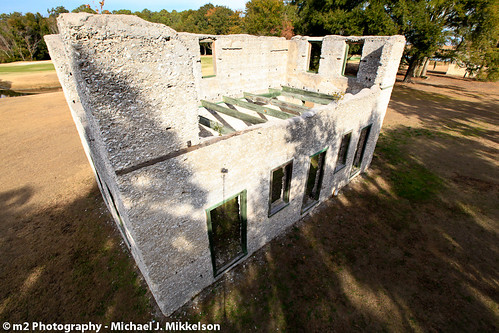
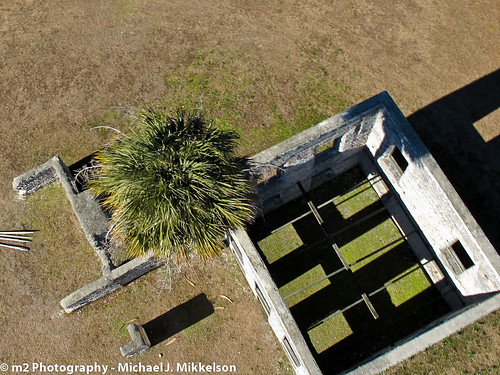
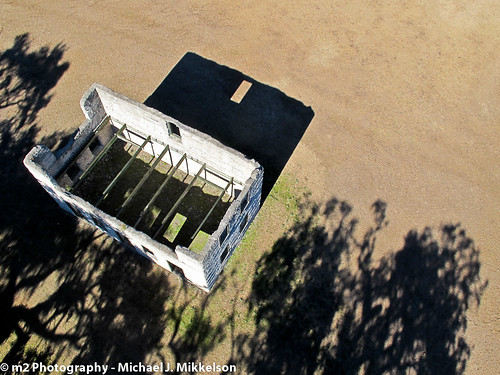
I was in South Carolina late last year, and was able to visit the Tabby Ruins on Spring Island on a couple of different occasions, once to try some Pole Aerial Photography, and also some Kite Aerial Photography. It was in the 40's both days, and that keeps the people of South Carolina indoors, so I had the place to myself again. For the Pole Aerial Photography, I thought I'd try to get images of the well-known ruins from a different point of view, and get some unique images.


I was lucky enough to get my kite up into the air for a KAP session, on a very brisk morning. The shadows coming through the windows are great!


For additional images in the Spring Island Gallery, click here.

Monday, January 24, 2011

Fusion Photography & Video

I would describe my current photography style as fusion, as I've been using a combination of images and video in my productions. Both of my canon dSLR cameras can capture images and video, and do a great job capturing image bursts. The addition of CHDK and scripting with my Point and Shoot cameras, and the use of GoPro HD hero cameras to capture slow motion video and intervelometer sessions, give me the opportunity to really create content that is unique in the marketplace. I have also been using Animoto as a video create service to quickly release content online for myself and clients. Here are a few multi-media slideshows that I put together this past weekend to showcase this fusion of media.


Kiteboarding trip to the Florida Keys, 2010
© Copyright m2 Photography - Michael J. Mikkelson 2011. All Rights Reserved. Images and video can not be used without permission.

University of Wisconsin Lifesaving Station 100 Year Anniversary
Video and animation is copyright 2010 by m2 Photography, 2011, and cannot be reproduced without permission.

2010 University of Wisconsin Alumni Band

Thursday, January 13, 2011

How to Create a "faux" Tilt-Shift Time Lapse Sequence Using CS5

Click on Image to Preview Video

I've done many time lapse video sequences, and also have used Photoshop to create a faux tilt-shift photo, but decided to try and mix the two. If you're a person who doesn’t want to drop a ton of money into a nice tilt-shift lens for your dSLR, Adobe Photoshop has the ability to mimic these types of shots. The problem with time lapse photography, is you end up with hundreds, if not thousands of images that go into the video. To individually process the faux tilt-shift style to all of these images would take forever. This is where Photoshop shines. This tutorial will show you the steps involved in creating the Tilt-shift effects to an image, and then show you how to record and create an Action to use on subsequent images. Then we'll review the Batch option to process the entire folder of images. The final step is to create the time lapse sequence in Adobe After Effects, but you can also use other software to accomplish this.

Part I: Photoshop

Step One: How to use Photoshop to create a faux tilt-shift image

  • Please note that we'll go through the process of creating the effect for one image, and then we'll learn how to use the batch automation to complete this processing on a whole folder of images.
  • The images will need to be part of a sequence to properly import into After Effects. If they are not sequentially named now, you should rename the images to a separate folder during the batch process.

: Open the image in Photoshop


: Go into QuickMask mode by pressing "Q" or by clicking on the quickmast toolbar icon.

:Select the Gradient tool by pressing "G" or choosing it from the toolbar.

: Ensure that you select the Reflected Gradient

: Experiment by dragging the gradient tool from about mid-screen downwards a bit. The longer you stretch the gradient, the more of the image that will be in focus. The shorter you drag it, less will be in focus. Each image will be different, but for this example, I chose to ensure that where the Bride and Groom will be standing needs to be in focus.

: You will see the red tone that is created by the quickmask.

:Press "Q" to exit QuickMask mode, and you'll see the highlight boxes (Ant's Marching) around the selection based upon how you dragged the gradient tool.

: Under the Filter menu, go to Blur, and select Lens Blur.

: After the lens blur filter is finished, let's modifiy the Vibrance of the image. Under the Image menu, go to Adjustments, and select Vibrance.
: The numbers I chose are personal preference, but maybe a good starting point for you.


: Next, Under the Image Menu, go to Adjustments and then select Curves.


: When the Curves dialog box appears, create a subtle "S" as illustrated below. Again, this can be modified to your preference.

  • You should now have a single image that recreates a Tilt-Shift type of shot. Experiment with the settings above until you have something you feel is ready for the next steps. Go ahead and close that image without saving, as you'll be creating an action to recreate all the steps listed above.

Step 2: Record a Photoshop Action

:Click the new Action icon under the Actions menu and name it Faux Tilt Shift.

:Repeat the steps above in photoshop while the action is "recording." Click the stop button after you are finished. Now you can create a tilt shift effect on any image with the click on a single button. Next, we'll create a batch job to run this action on an entire folder of images.

Step 3: Create an Automated Batch Job

:Under the File menu, find Automate and select Batch.


:Ensure that Faux Tilt Shift, or whatever you named your action is selected under the play section. Choose the folder with the original images for the source. Under Destination, create and select a different folder for these modified images to be saved. If the original images were not named with a sequence number, it's a good idea to add that into the destination name so it will be easier to create the Time Lapse sequence.


:Wait for the Batch job to finish, and it could take a while if you have a big folder of images to process. The time lapse posted above took over 12 hours to finish, and this will be different for everyone based upon the original size of the images and the processing and memory power of your computer.

Part II: Creating a Time Lapse in Adobe After Affects (Coming Soon)