Had a great time last night traveling to different locations to try the long exposure, steel wool on fire shot.
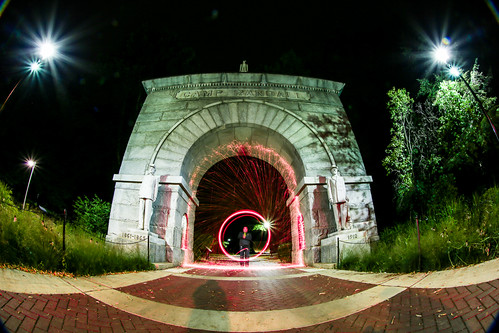


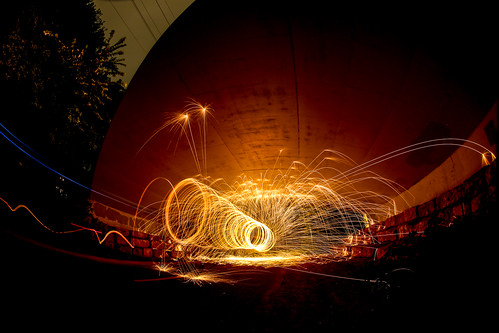
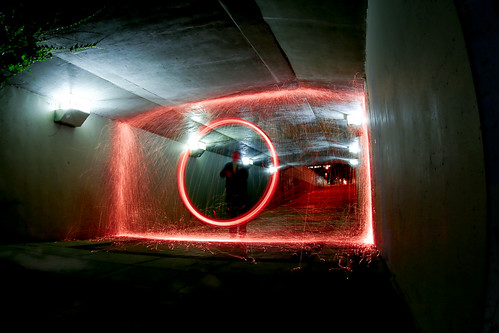
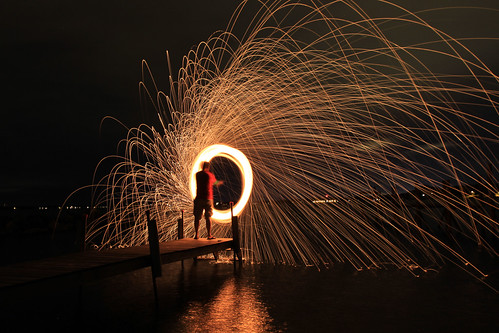
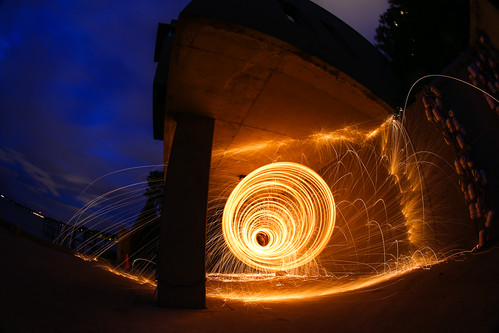

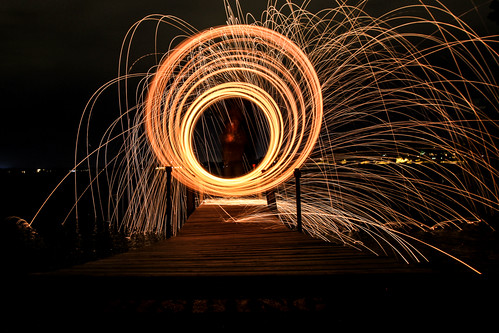
Had a great time last night traveling to different locations to try the long exposure, steel wool on fire shot.
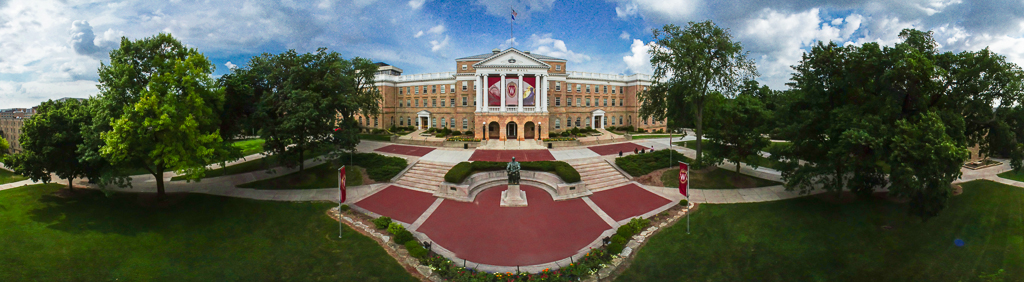
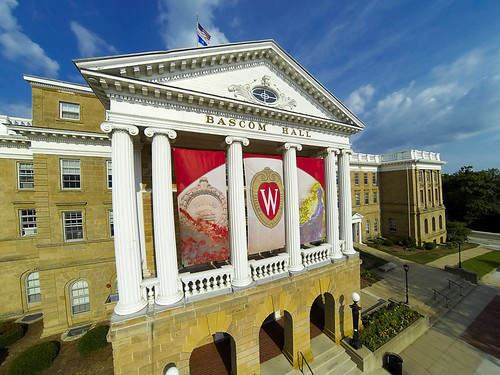
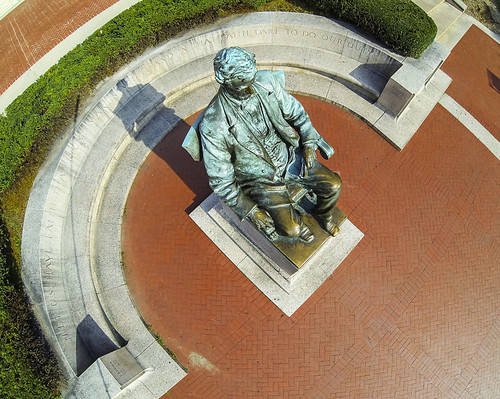
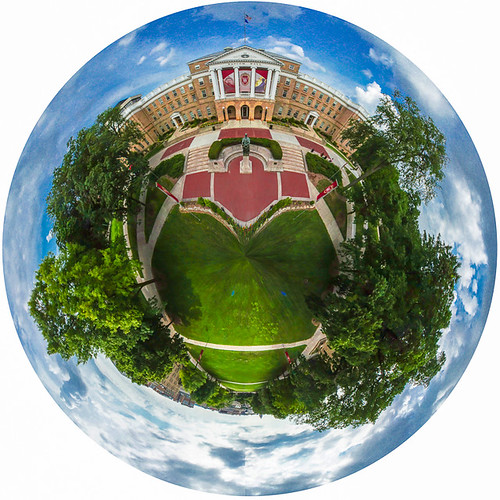
When you graduate from the University of Wisconsin, Madison, you're technically eligible to sit on Abe Lincoln's lap at the top of Bascom Hill. This iconic UW spot has been on my list for a while. I attempted this a couple of years ago, and came back to try and get a panoramic image from the top of my photography pole. Although, not perfect, the results were still good!
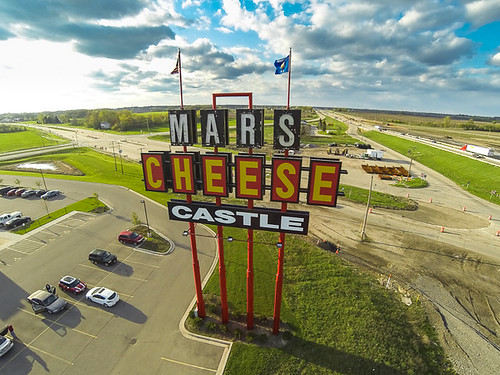
The Mars Cheese Castle is filled with Wisconsin goodness, including lots of Wisconsin cheese. The giant cheese sign can be seen off I-94 just north of Kenosha. In the past couple of years, Mars built an entirely new facility, or Castle, and moved the giant sign just a bit farther west. Anyone who travels out of Wisconsin on I-94 has seen the sign, and I wanted to capture it from an aerial perspective.

This was the first time since I've been flying kites that I had the wind change directions 180 degrees in a matter of 5 minutes. I had the kite flying to towards the southeast when I started, and it shifted towards the Northwest within a few minutes of having the kite up. Really strange, but this direction works well for capturing the sign. There is a lot of construction around the site, as they bulldozed the old cheese castle.
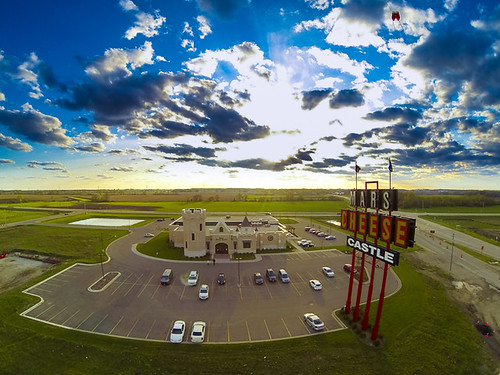
Wind was light be steady, so I only flew with one camera, a GoPro HD Hero 3 on a static rig. The cheese castle is a tourist trap for Illinois residents heading out of state. Though the selection of cheese and root beer is excellent, locals know that you can go down to Woodman's a few miles away and pay half for your cheese curd fix.
I purchased a few Bubble Wrap Gallery Pouches from Frame Destination to help protect my larger framed prints during transport to my Art Fairs this summer. I found out quickly that it's very easy to scratch, scruff, or damage a frame during setup, take down, and transport. I told myself that I'd invest in some better packaging the frames and prints for the 2013 art fair season. The pouches that I bought from Frame Destination turned out to be very good quality and fit my frames with a little extra room. After shipping and handling, each of these pouches ended up being $19.99. Since I have a number of other large metal art and framed images, I thought I would try to find a cheaper solution that I could do myself for the rest of my frames and prints.
Here is the commercial version from Frame Destination.


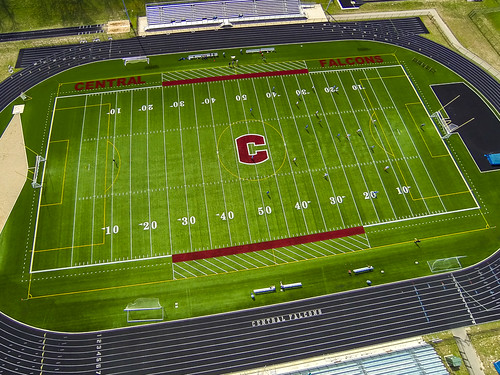
Nothing like waiting until the last minute to participate in WWKW 2013. I was busy at work, and the weather didn't cooperate until the very last day. I was able to go local and grab images from my local high school. To view the flickr group for WWKW, click here.
I have a friend who has been doing roller derby for a few years, and I asked her to get me a media pass for one of her bouts this year. I've shot a roller derby event before, and it's a lot of fun. This time, I didn't just bring my dSLR cameras, but stuck a GoPro on the helmet of one of the skaters.
The Quad Squad is a team on the Madison Mad Rollin' Dolls roller derby league, and they asked me to follow them around before the event and capture their routine. The GoPro HD Hero 3 footage was easy, as that was recording almost non stop for the entire day. I knew that I'd be putting together an Animoto video of the images, video, and time lapse sequences, so I always reminded myself to get as many different angles as possible. Here is the result:


For event photography, having the ability to create backups of your image is essential in case the memory card is corrupted, theft, or stupidity. (Something stupid would be reformatting a card and overwriting pictures.) I do have an Epson P-7000 which allows me to backup memory cards immediately after they are full. The P-7000 even has the ability to act as a tethering device to write copies of the images to the external hard drive immediately. The only problem is that you need to be physically tethered to the device with a USB cable. Not very convenient.
Along comes wireless hard drives like the Seagate Wireless Plus. I ordered one of these 1TB hard drives with the sole purpose of using it as a wireless tethering device. The only problem is that out of the box, this is a streaming device, and doesn't work the way I want it to. Solution? The friendly folks at www.hackseagatesatellite.com have released an alternative firmware for the Seagate Wireless Plus. For just $35, the firmware allows you to run the wireless unit as an Eye-Fi server. It's got other features too like FTP, Samba, iTunes server, and dropbox synchronization. However, I plan on using almost exclusively for wireless tethering at events.
I recently upgraded one of my dSLR cameras from a Canon 5D Mark II to the 5D Mark III, which coincidentally has a secondary memory slot. This memory slot can house SD cards, which make using an Eye-Fi card possible. This means that as you take pictures, the images are wirelessly transmitted to the Seagate hard drive within seconds.The drive comes with a USB dongle which allows you to use the drive as an external USB hard drive, so it has other purposes. I have an event this weekend, and plan on testing the range on the hard drive, and if all my images show up automagically. Please note, that once you load this alternative firmware, the Seagate ipad/android apps no longer work. It's a trade off for going from a streaming device to a wireless server.


