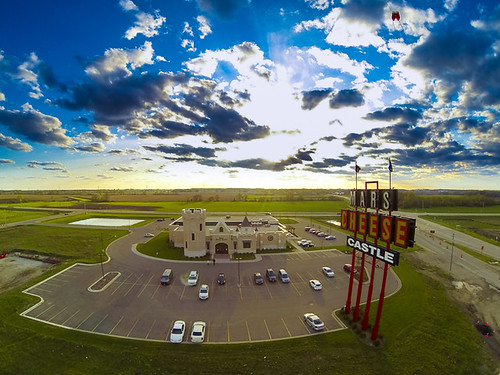
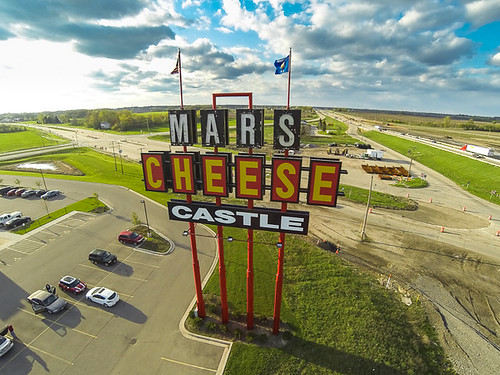
The Mars Cheese Castle is filled with Wisconsin goodness, including lots of Wisconsin cheese. The giant cheese sign can be seen off I-94 just north of Kenosha. In the past couple of years, Mars built an entirely new facility, or Castle, and moved the giant sign just a bit farther west. Anyone who travels out of Wisconsin on I-94 has seen the sign, and I wanted to capture it from an aerial perspective.

This was the first time since I've been flying kites that I had the wind change directions 180 degrees in a matter of 5 minutes. I had the kite flying to towards the southeast when I started, and it shifted towards the Northwest within a few minutes of having the kite up. Really strange, but this direction works well for capturing the sign. There is a lot of construction around the site, as they bulldozed the old cheese castle.

Wind was light be steady, so I only flew with one camera, a GoPro HD Hero 3 on a static rig. The cheese castle is a tourist trap for Illinois residents heading out of state. Though the selection of cheese and root beer is excellent, locals know that you can go down to Woodman's a few miles away and pay half for your cheese curd fix.

Monday, May 13, 2013
Mars Cheese Castle Aerial!
Friday, May 10, 2013
DIY Gallery Pouches - Reflective Bubble Wrap
I purchased a few Bubble Wrap Gallery Pouches from Frame Destination to help protect my larger framed prints during transport to my Art Fairs this summer. I found out quickly that it's very easy to scratch, scruff, or damage a frame during setup, take down, and transport. I told myself that I'd invest in some better packaging the frames and prints for the 2013 art fair season. The pouches that I bought from Frame Destination turned out to be very good quality and fit my frames with a little extra room. After shipping and handling, each of these pouches ended up being $19.99. Since I have a number of other large metal art and framed images, I thought I would try to find a cheaper solution that I could do myself for the rest of my frames and prints.
Here is the commercial version from Frame Destination.
DIY Gallery Pouch
I purchased a roll of Reflective Bubble Wrap foil insulation at Menards. I already had duct tape and sticky back velcro. Using a scissors I cut enough foil to wrap the frame leaving a little extra on each side. In this example, I'm creating a pouch for a square metal print.World Wide Kite Aerial Photography Week 2013
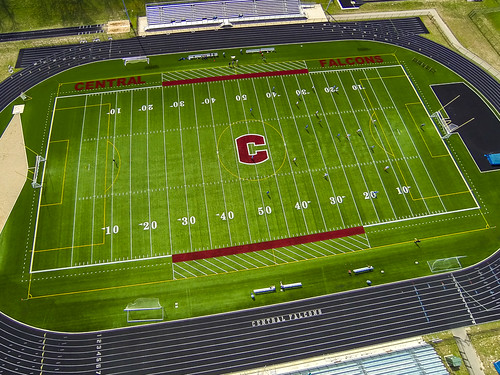
Nothing like waiting until the last minute to participate in WWKW 2013. I was busy at work, and the weather didn't cooperate until the very last day. I was able to go local and grab images from my local high school. To view the flickr group for WWKW, click here.


